
Last Updated on June 3, 2026 by Sheryl Cooper
Inside: This toddler shamrock craft turns a piece of cardboard into a fun St. Patrick’s Day activity and it is simple to make with just a few materials!
In March we love to add St. Patrick’s Day activities to our rainbow theme.
We’ve had fun with shamrocks in the past, such as our shamrock collage, spin art shamrocks, and color-mixing shamrocks.
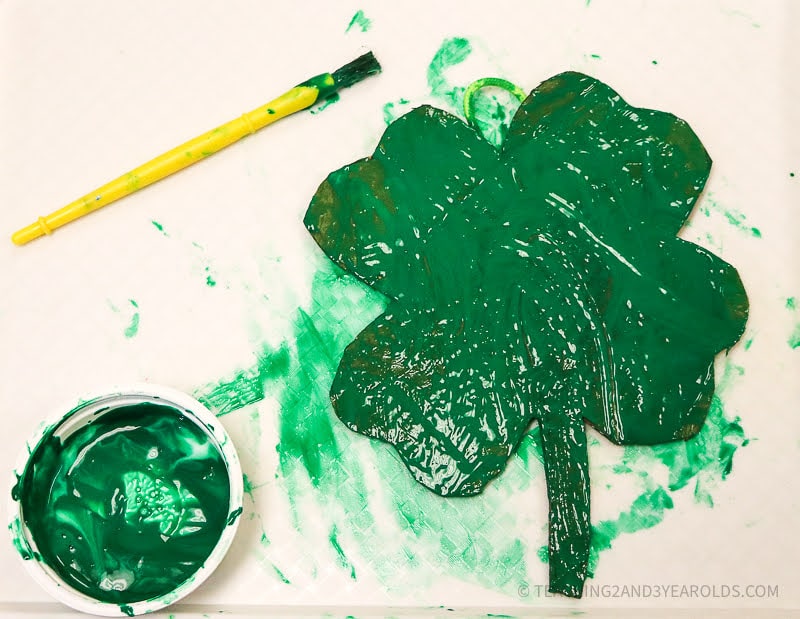
This year our toddlers have had a lot of fun with pom poms, so I thought I’d use a technique similar to our pom pom hearts craft, using sturdy pieces of cardboard, paint and glue.
I added some dyed rice for extra fine motor, plus it gave texture to the activity.
This part ended up being the highlight of the craft!
While the process is what’s always most important, I have to admit these turned out so cute hanging in our classroom!

Why I Chose Cardboard
You might be wondering why I chose cardboard rather than paper for the shamrock.
First of all, I love using recycled items whenever I can. There is always cardboard in my house. (Gee, it couldn’t be from all those Amazon orders, right? Nah…..)
Secondly, cardboard is sturdy.
I can’t tell you how many times we’ve used paper for a craft that included paint and glue only to find the final product all curled up once dry.
Frustrating!
Our toddlers love to slather on the paint, so I wanted the shamrock to be constructed of something thick.
You’ve seen us do this with:
Cardboard Hearts (Using To-Go Cup Sleeves)
And we’ve even done shamrocks many years ago:
Mixing Glue and Paint
Another reason I wanted something sturdy was because we’d be using glue AND paint.
When I want color in the background of our collage artwork, I love tinting our glue.
I used to do this with my firstborn at our kitchen table. He absolutely loved creating collages, so I started tinting our glue to make it more fun.
I’ve continued that technique through my teaching career and all of my students have preferred it over plain white glue.
How to tint glue:
Use equal parts white glue and tempera paint.
You don’t need to measure. Just eyeball it.
I don’t even mix it together, but leave that part for the children to do. More fine motor, after all!
If you want a color mixing experience:
Rather than use green paint, add a dollop of blue paint and a dollop of yellow paint. Then when the children mix everything, they will come up with green! In hindsight, I wish I had done that with this activity. We’ve done shamrock color mixing art before and it was so fun!)

How to Dye Rice
This is my go-to recipe:
- Grab a gallon sized plastic baggie that can be sealed.
- Pour about a cup of rice inside the bag.
- Add about a teaspoon of white vinegar or hand sanitizer
- Add as much coloring as desired. (I love using Wilton icing color!)
- Seal the bag and shake until the rice is coated well.
- Open the bag and dump the rice onto a paper towel, spreading it out so it’s a very thin layer.
- Allow to dry thoroughly.
Shamrock Template
If you don’t want to free-hand a shamrock (I admit I did not do that), I have a template for you!

Once you’ve downloaded the template, cut out the shamrock and trace the design onto the cardboard.
Pom Pom Toddler Shamrock Craft
So, let’s get started!
Supplies
- Cardboard
- Some sort of string or ribbon for loop
- White glue
- Green tempera paint (or blue and yellow, if you want color mixing)
- Tinted rice
- Green pom poms
- Paint Brush
- Spoon
- Trays (These are our favorite!)
Preparing This Toddler Shamrock Craft
Use scissors or a craft knife to cut shamrocks from cardboard. As mentioned above, you can use the free template if that makes things easier.
Make enough so that each student gets one shamrock.
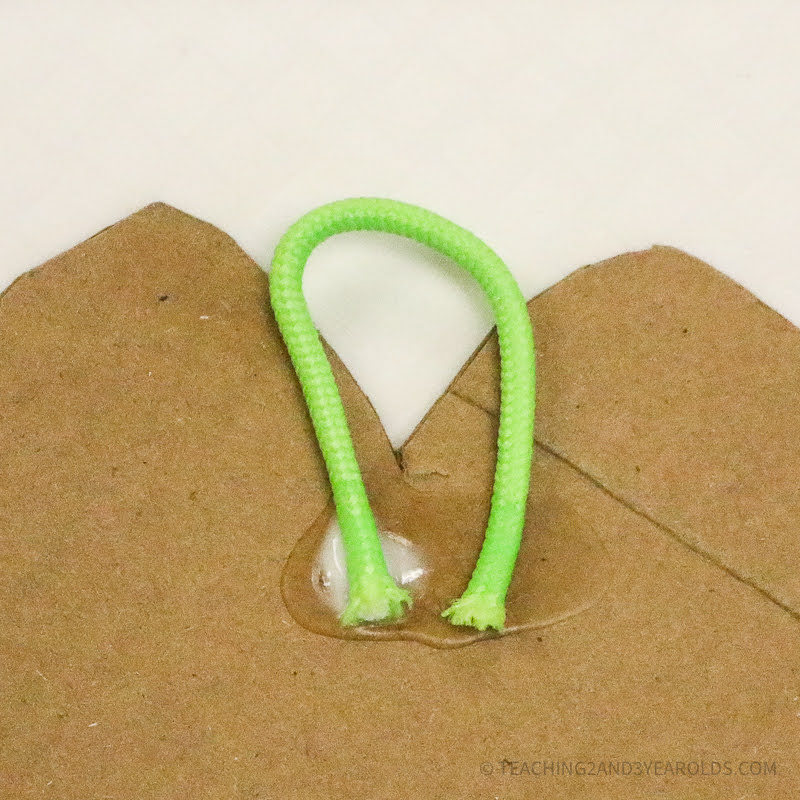
Then, cut the string/ribbon about two inches long and create a loop at the top of the shamrock, glueing the ends in place.
For each shamrock you will want:
- Container of pom poms
- Container of rice
- Container of glue/paint mixture
- Cardboard shamrock
- Spoon
- Paintbrush
Place everything on trays.

Invitation to Create!
Call your children over to the art table.
We usually have six spots available at our art table, and it’s part of our free-choice centers time.
Therefore, not everyone will be able to be there at the same time.
If children say they want to be there but all the chairs are taken, we tell them we will call them to the art table when there is an empty chair.
Step One: Brush the Glue/Paint On Shamrock
Encourage your toddlers to brush the glue and paint mixture all around the shamrock. To be honest, only one of ours actually covered the entire surface, and that’s fine. This is not unusual for 2 year olds.

When they are finished brushing the glue/paint mixture on the shamrock, remove that container along with the brush.
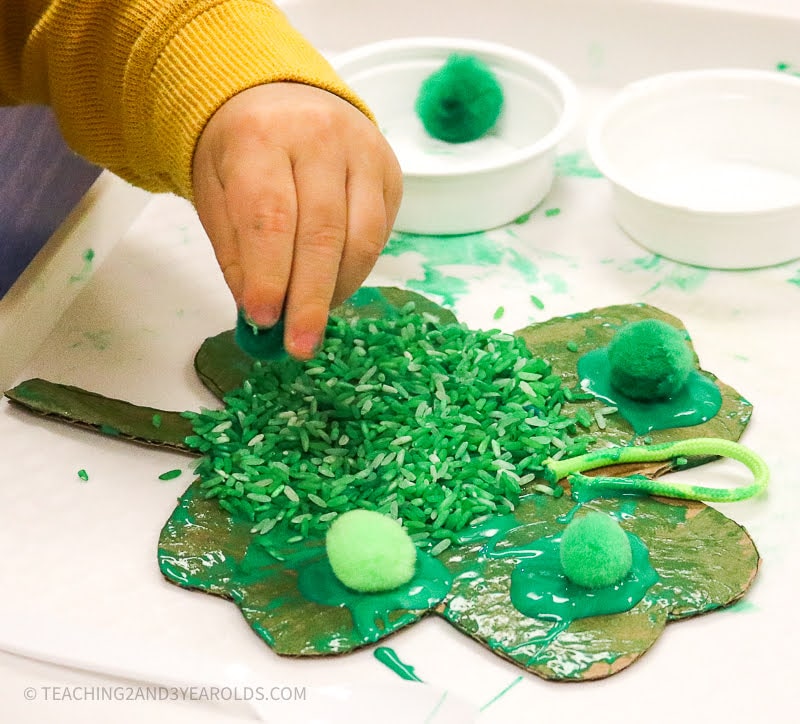
Step Two: Add the Rice and Pom Poms
Show your toddlers how to take a spoon and transfer the rice from the container to the shamrock, dropping it on top.
This takes great concentration, and some toddlers will prefer to just use their fingers. Since they are pinching the grains of rice, this is a great way to strengthen fine motor skills!
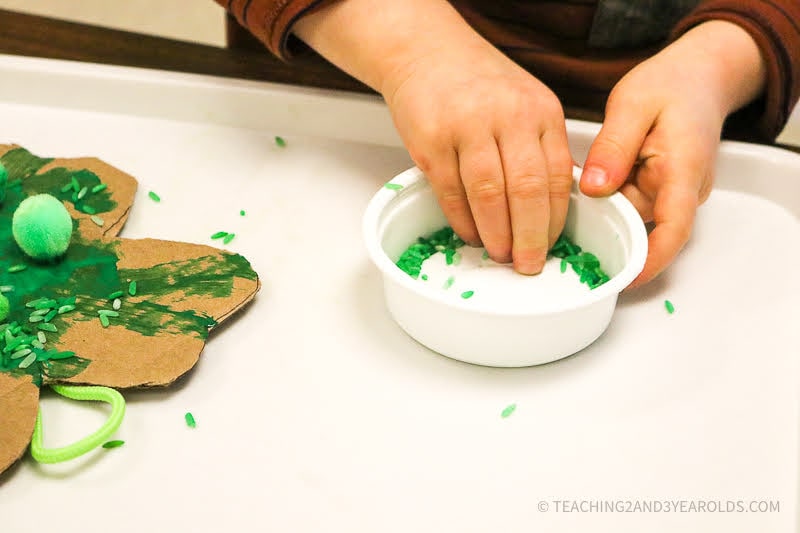
Some of our toddlers spent a great deal of time on this part!

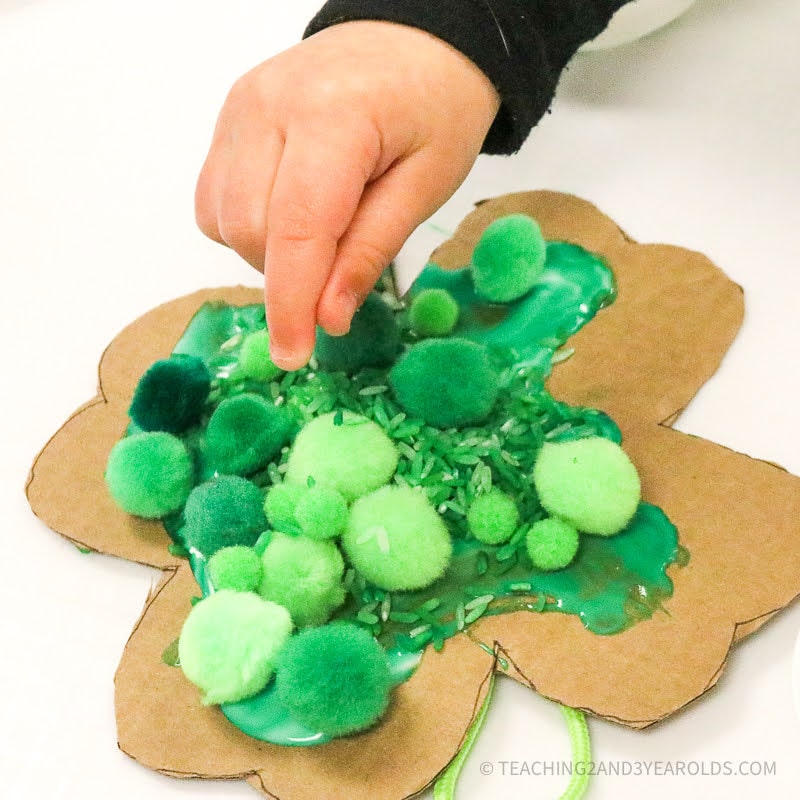
Picking up the pom poms with the fingers and then pressing them into the glue is another great way to strengthen the fingers.
(Note: the loop in the above and below photo should have been glued to the back of the shamrock, not the front. Oops! Don’t use that one as an example! 😛)
Remove Excess Rice!
When the shamrock is finished, gently tip the the shamrock to its side so excess rice falls off.
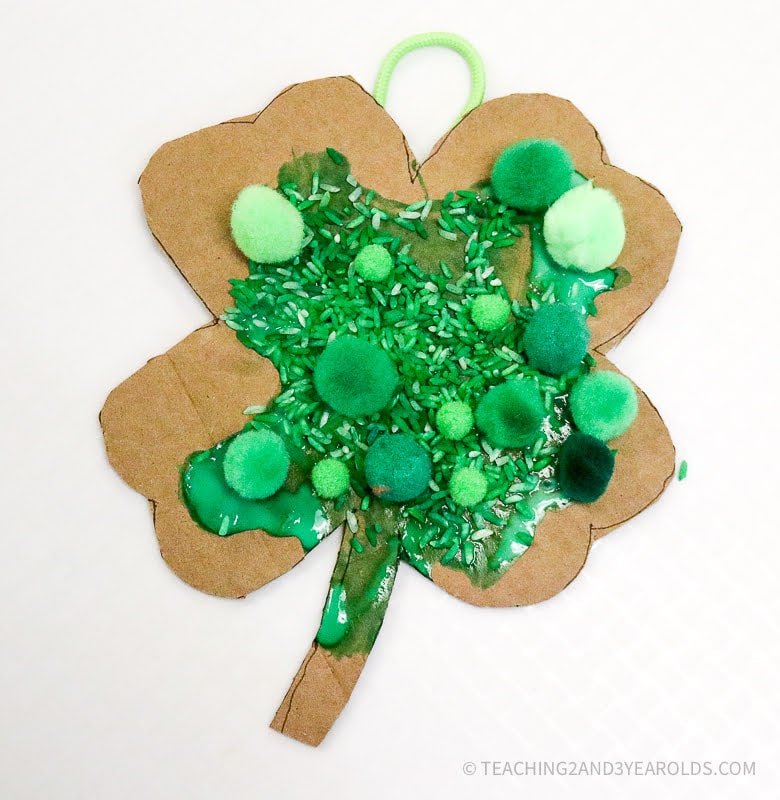
Let the shamrocks thoroughly dry and then they are ready to be hung in the classroom for display!
Add These To Your Week
Circle Time: Numbered Shamrocks (Free Printable)
Circle Time: Shamrock Props (Free Printable)
Sensory: St. Patrick’s Day Sensory Bin
Sensory: Find the Gold Coins
Math: Gold Coin Hunt and Count
Music: St. Patrick’s Day/Rainbows Playlist


FREE CIRCLE TIME PLANNER!
Get your FREE circle time planner as a gift when you subscribe to my free weekly newsletters.
Here is my Privacy Policy