
Last Updated on January 19, 2022 by Sheryl Cooper

Big Cardboard Preschool Snowman Art
What we used:
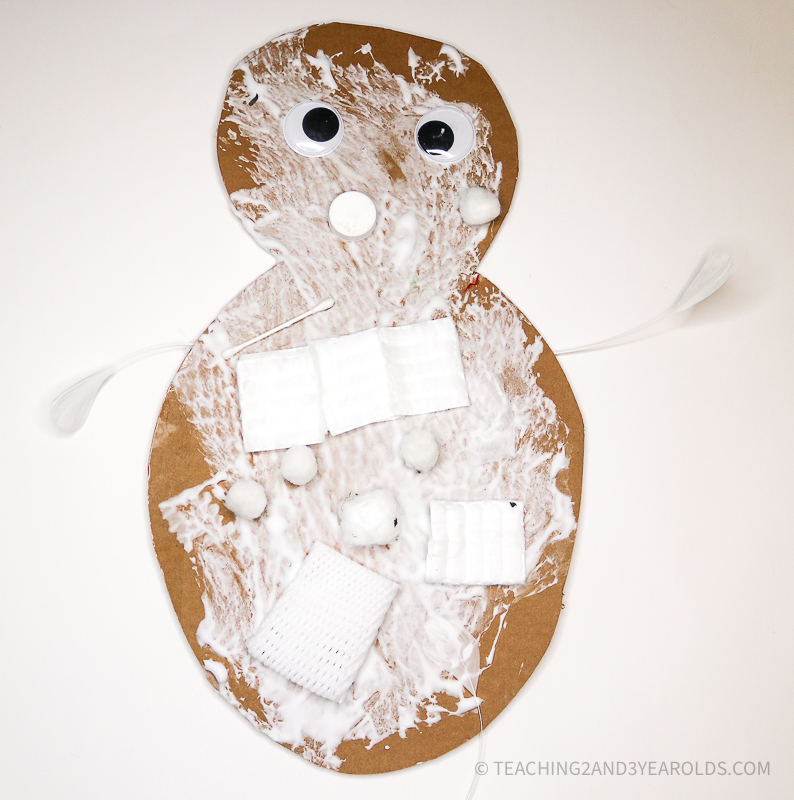
- Big snowman shape, cut from cardboard
- Xacto Knife
- Puffy glue (see recipe below)
- Rollers
- Big googly eyes
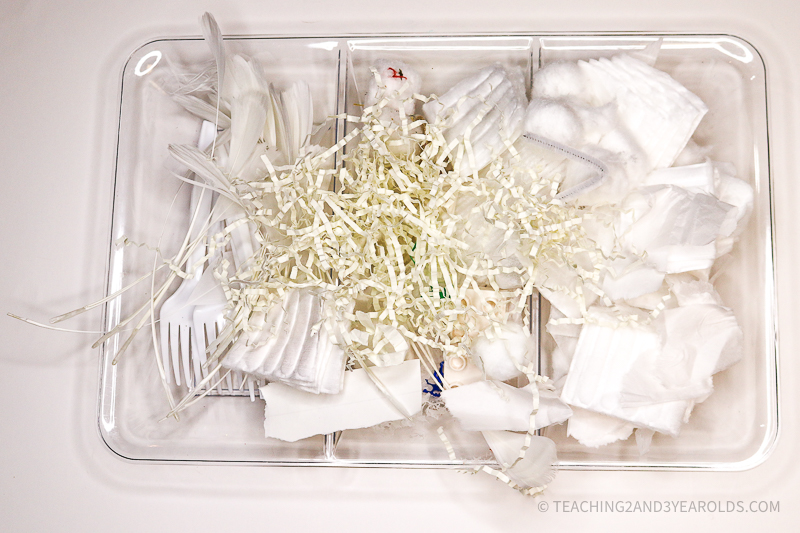
- Assorted white loose parts
Puffy glue:
Squirt shaving cream and white glue onto a tray. I use about equal parts of both (it doesn’t need to be exact). Mix well.
Preparing This Activity
Cut simple snowman shapes from cardboard. I made one for each of my students. I find using an Xacto knife works better than scissors, especially if cardboard is a bit thick.
Gather white loose parts and place them in trays.
I looked for a variety of textures, such as Duplo bricks, feathers, cotton pads, crinkled paper, buttons, paper and forks (for arms and hands).
Place the snowmen and loose parts at a table along with trays of puffy paint and rollers.
You are ready to go!
The Invitation to Create a Snowman
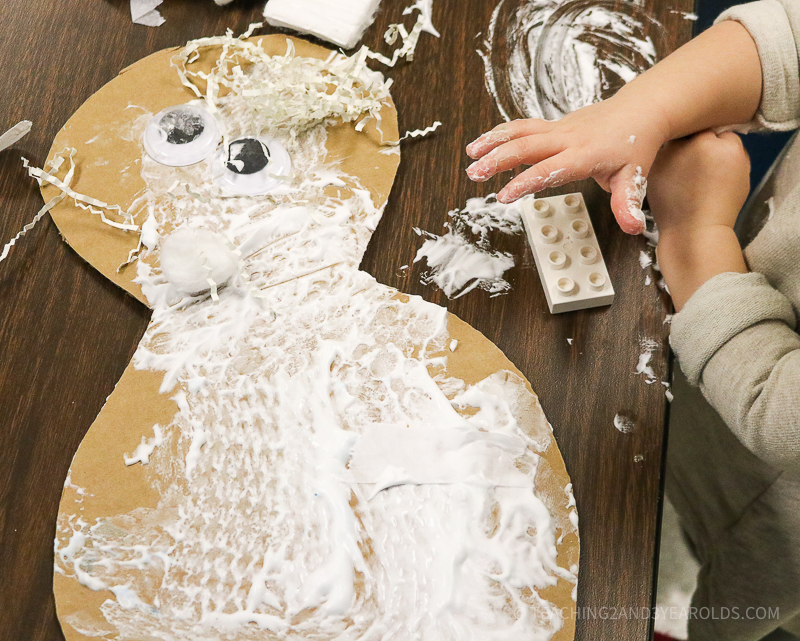
Have your children roll the puffy glue onto their cardboard snowmen.
I love using rollers because they encourage big movements, working the entire arm and shoulder.
Some previous roller activities we’ve enjoyed:
We also use them on the easel for a vertical fine motor experience!

Rolling the Puffy Glue
Step one is to roll the puffy glue onto the cardboard.
Some might not cover the entire piece of cardboard, and that’s okay.
Just encourage covering as much as possible.

Add the Eyes
Just stick them right into the puffy glue!

Add the Loose Parts
It’s time to add the pieces that are in the tray.
Some of our children used the crinkled paper as hair.
Others put it right on the body.
There is no right or wrong!

Using different textures adds more sense of touch to the activity.
Again, this is something to consider when choosing your loose parts.

If your children are like ours, this will be a busy art table!
When Finished
As each of your children finish adding the pieces to their snowmen, allow to thoroughly dry. The puffy glue will still be a little tacky, but the pieces should stick. If, however, anything becomes loose and/or falls off, you can use white glue to reattach them.

We then displayed them around our classroom!

Add these ideas to your week, too!
Circle Time: 5 Little Snowmen Circle Time Props
Math: Icicle Count and Clip
Process Art: Winter Collage
Colors: Snowman In The Cold Color Matching Activity
Table Activity: Snowman Button Counting
Playdough: Build a Snowman
Sensory: Pom Pom Snowman Sensory Bin
Books to read with this activity:


FREE CIRCLE TIME PLANNER!
Get your FREE circle time planner as a gift when you subscribe to my free weekly newsletters.
Here is my Privacy Policy
What a great process art project! I’m adding it to our “To-Do” list!
Jamie
Play to Learn Preschool
Thank you, Jamie! Yes, they definitely put their own touches on it. 🙂
Awesome! Hands-on and cheap! What’s not to love! Although I could see some of my preschoolers getting totally distracted by popping the bubbles!
I was surprised mine did not, as they love to pop bubbles when we put packing wrap on the floor in the gym. I think they were too interested in how the paint felt being applied on the bubbles.
Gosh you can do so many different things with bubble wrap can’t you? I love the different looks of the snowmen. Thanks for linking up to Mummy Mondays.
Thank you for hosting it, Eva!