
Last Updated on February 20, 2026 by Sheryl Cooper
Inside: Learn about colors with this toddler rainbow craft. Super simple for little hands and these look adorable as a classroom (or home) decoration!
March is a great month to introduce colors to toddlers!
After a winter of dreary skies and dull landscapes, we love a pop of color in all areas of our classroom.
There are loads of great ideas for older preschoolers, but require knowing the order of the colors.
For our younger crowd, I like to focus on the colors themselves, not the order they go in.
We add color exploration in every center of our classroom, plus we sing songs and read books about rainbows.
Such a fun way to learn colors!

This toddler rainbow craft is an example of how you can teach color recognition in fun, hands-on ways.
I am often asked how I teach our 2 and young 3 year olds their colors.
This, my friends, is how.
If you’d like to see some other examples, check these out:
While exploring any activity center that involves color, toddlers are learning to identify them.
This is when we will also add some color matching ideas, such as:
- Egg Color Sorting Puzzles (Free Printable)
- Easter Bunny Color Matching Puzzle (Free Printable)
- Rainbow Fish and Bowls Color Matching (Free Printable)
All of these activities inspired me to try today’s rainbow craft!

Colorful Toddler Rainbow Craft
Ideas come in interesting ways (at least for me!), and this activity was tossed around in my head as I was cleaning out kitchen cupboards.
Long ago I took a cake decorating class and had these cardboard cake rounds leftover. They actually traveled through two house moves – yikes!
I finally concluded that my cake decorating days are over (or maybe I can pick it up again when I retire???), but what surely I could find something to do with these rounds.
I had rainbows on the brain since that was our upcoming theme, so I pictured cutting each round in half to make a rainbow shape.
I love how these were already white (well, yellowed a bit after all those years….), so we could just glue pieces on top.
You can see I was not exact with cutting them out, but that stuff doesn’t bug me.
Now we have these colorful rainbows and I have more room in my cupboard! 😍
Note: You probably don’t happen to have cardboard cake rounds in your cupboards, so that’s certainly not a requirement for this activity. I will explain in a moment.
Supplies
- Cardboard
- Colorful pieces in the colors of the rainbow (we used cellophane and tissue paper squares)
- White pom poms or cotton balls
- White glue (and white paint, if your cardboard is not already white)
- Paintbrushes (if your children want to brush the glue onto the cardboard rather that squeeze directly from the bottle)
- String or something similar to use as a loop at the top
Putting this Craft Together
Cut cardboard into rainbow shapes.
Gather your cellophane and tissue paper and make sure they are the colors of the rainbow. (If you have other colors, remove them.) You might need to cut them into smaller pieces depending on how they were purchased.
I collected enough containers so each child had one, and then I sorted the pieces and placed them into the containers. You want to make sure each color of the rainbow is represented.
Cut pieces of string so they are about 2 inches long. Create a loop and place at the top center of the rainbow. Glue the ends to the cardboard.
Place pom poms/cotton balls in separate containers.

The Cardboard
If you don’t have white cardboard:
(If your cardboard is already white, move on to the next step.)
If you want a white background, and your cardboard is not already white, you can first have your children paint it white.
This might require two days so that you can let the paint dry before adding the pieces.
If you want it done in one step, you can combine glue with white paint and have your children apply it to the cardboard before adding the pieces.

The Set Up
Place cardboard shapes on a table (we like to set them on these trays) with glue.
Have the colored pieces and cotton balls nearby, ready to go.
Time to Create!
Invite your children to apply glue on the cardboard.
We used squeeze bottles, but you can pour glue into small containers and have yours brush glue on top.

If using glue bottles, remind your children to move the bottle around so the glue doesn’t puddle in one spot.
I like using squeeze bottles because it’s a great fine motor activity for toddles. They aren’t (usually) strong enough to empty the glue quickly, so they have to really work at getting the glue out of the bottle.

Once the glue has been applied, it’s time to add the colored pieces.
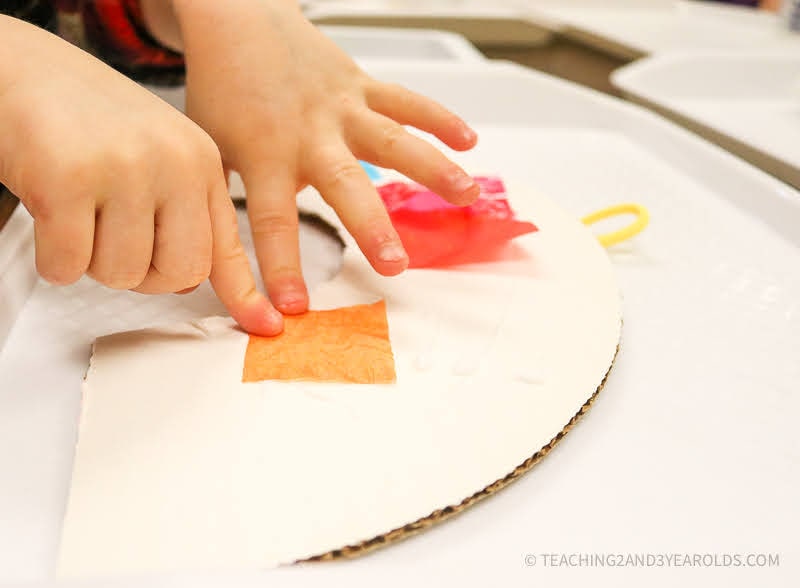
More fine motor is taking place as the fingers are pressing the pieces onto the cardboard.

If you are working with preschoolers, you can add a challenge by having them place the pieces in “rainbow order”. But, as I mentioned earlier, I did not do that with our toddlers. They had fun pressing the pieces where they wished, while also identifying the colors.

Adding the Clouds
Our last step was adding the clouds. We used white pom poms, because that’s what I had on hand. But you could use cotton balls, too.
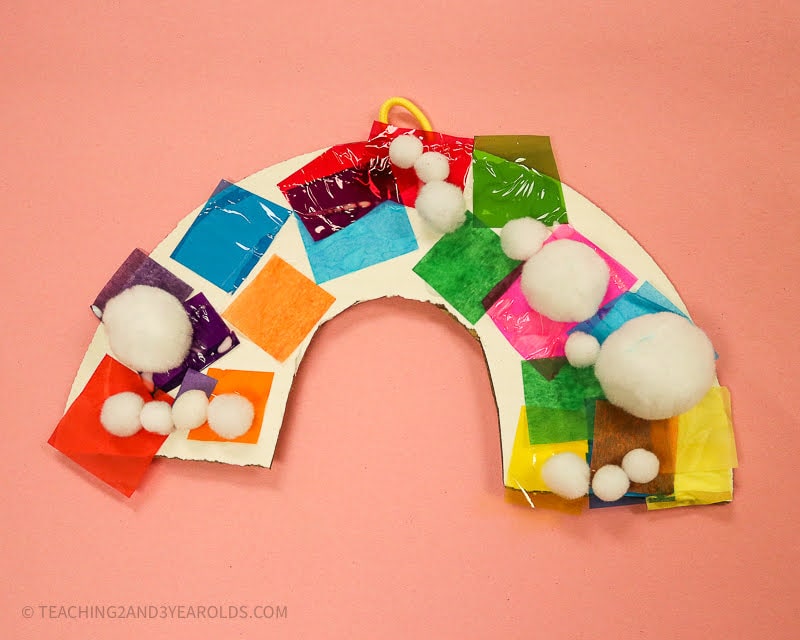
Now they are ready to hang in our classroom!
More Rainbow Activities


FREE CIRCLE TIME PLANNER!
Get your FREE circle time planner as a gift when you subscribe to my free weekly newsletters.
Here is my Privacy Policy
Sheryl I am interested on lesson plans for young toddlers. Is my first year with children sent you an email three o four days ago.
Rosa.
Hi Rosa! I am not seeing an email from you. I am so sorry! I will send you an email.