
Last Updated on March 3, 2024 by Sheryl Cooper
Inside: This toddler and preschool shamrock art activity is super fun because it uses a salad spinner. A perfect process art activity go to with the St. Patrick’s Day theme!
I bet you never thought of using a salad spinner at the art table, am I right?
Many years ago I somehow found out about using this nifty kitchen tool as a color mixing activity. I can’t recall when. (Because that’s what happens when you’ve been teaching for a couple of decades.)
But we have used this process a lot. You might recall us using this method to make a Christmas tree, hearts, and pumpkins.
Now, it’s time for shamrocks.
And just as it always is, our toddlers and preschoolers LOVED this activity!
No time to read? Pin and save for later!

Come see how we set up our classroom for the St. Patrick’s Day Theme!
Salad Spinner Shamrock Art Activity
What we used:
- Salad spinner (this one is my very favorite)
- Your choice of tempera paint
- Shamrock printable (scroll down to find the download)
Setting up this color mixing activity:
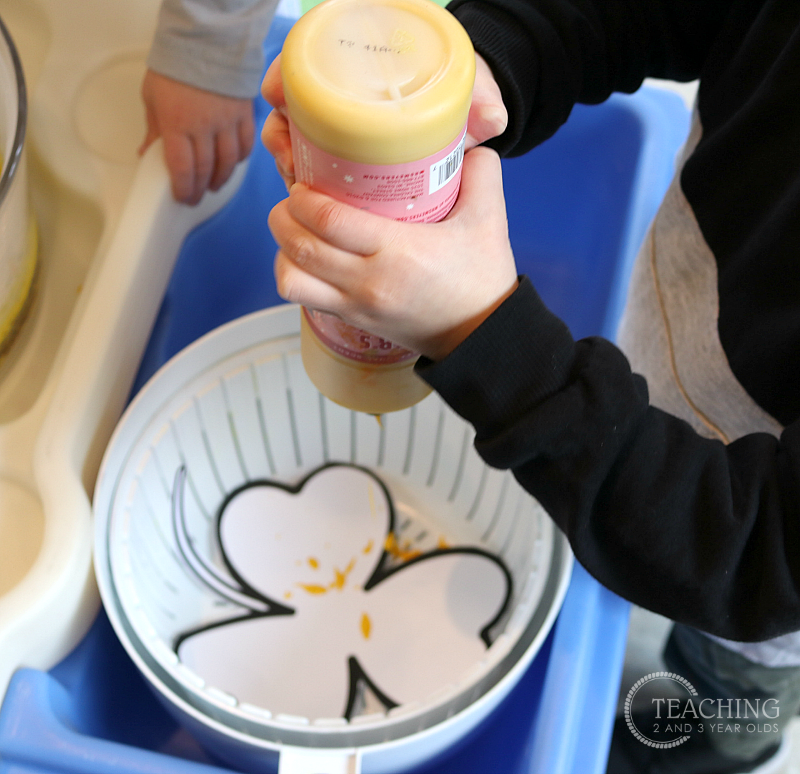
Cut out the shamrock shape and place it inside the salad spinner.

Squeeze the paint on top of the shamrock.
Since we are more than halfway through the school year, and we’ve done salad spinner art a couple of times already, I let the children squeeze the paint onto their shamrocks.
I am right there watching, as I know some will just keep squeezing until the bottle is empty.
And yes, that IS a liquid dish soap bottle that I’ve repurposed as a paint bottle. Our preschool gets their paint by the gallon, so I fill these little bottles with different colors so they can conveniently be stored above our classroom sink. I’ve also purchased plastic squeeze condiment bottles for this purpose.
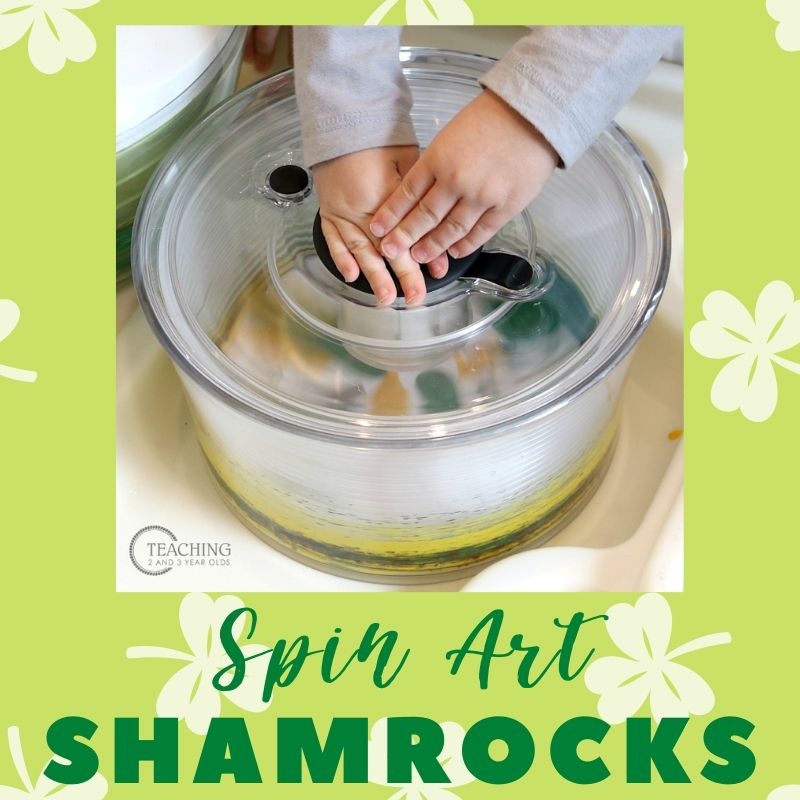
Once the paint is on the shamrock printable, place the lid on the salad spinner and make it go!
In addition to my favorite salad spinner with the push knob on top, we also have 2 others. One has a knob that needs to be turned and the other has a lever that is pushed and pulled.
I had all 3 spinners going at the same time and you can imagine the excitement and noise level as the children were pushing, pressing, pulling, and turning knobs and levers.
These types of activities engage the entire body as the children stand beside the table, balancing their bodies as they work hard to make the paint spin on their shamrocks.
It’s a great activity for busy kids!

Once the paint is spun around a bit, the lid can be removed and the wet shamrock placed on a tray to dry.

They make a great classroom decoration or can be added to a St. Patrick’s Day bulletin board.
You can leave them as is (like I’ve done), or you can glue them onto a solid piece of paper. (Note: depending on the weight of your paper, some of the shamrocks might curl when they are dry. This is when you might want to opt for gluing onto the solid piece of paper.
I personally don’t get too worried about this, because what I’m most interested in is the process of the activity, not the final product.
I know my 2 and 3 year olds can’t wait to try this again!

Get your free shamrock printable here:

More St. Patrick’s Day activities to try:
St. Patrick’s Day Sensory Bin with Gold Coins and Treasure Chests


FREE CIRCLE TIME PLANNER!
Get your FREE circle time planner as a gift when you subscribe to my free weekly newsletters.
Here is my Privacy Policy