
Last Updated on October 27, 2025 by Sheryl Cooper
Inside: Toddler Christmas tree painting on ice is amazingly fun! Once you have your ice ready, grab some watercolors and invite your little ones to paint on top of it. It’s a wonderful calming activity during a season that can feel so rushed.
Welcome to the Christmas season, where life can feel so rushed as we try to do a million things at once.
Even we teachers are guilty of bringing that stress into our classroom.
As soon as Thanksgiving break is over, we are making our lists that include gifts for parents, extra activities, perhaps a Christmas program, too.
It can be crazy.
And if we adults feel that way, how do we think toddlers and preschoolers feel? They are the recipients of everything we put out there.
I am guilty of this, even though I preach to other teachers not to go crazy during this season.
In fact, I found myself trying to squeeze an extra Christmas art activity into our 3 hour morning. Thankfully I stopped myself.
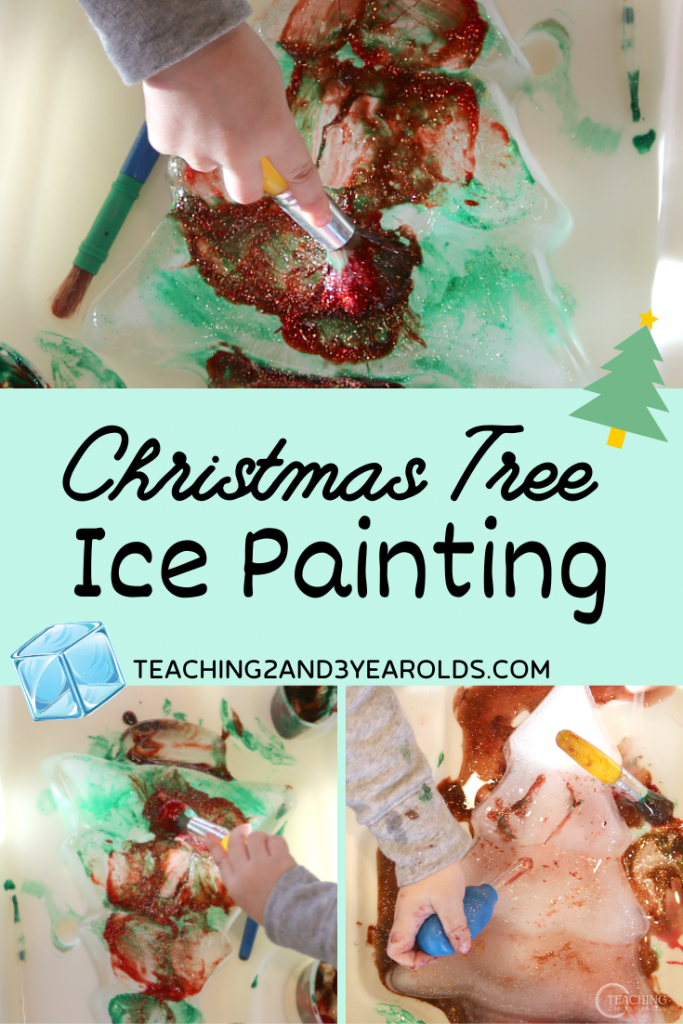
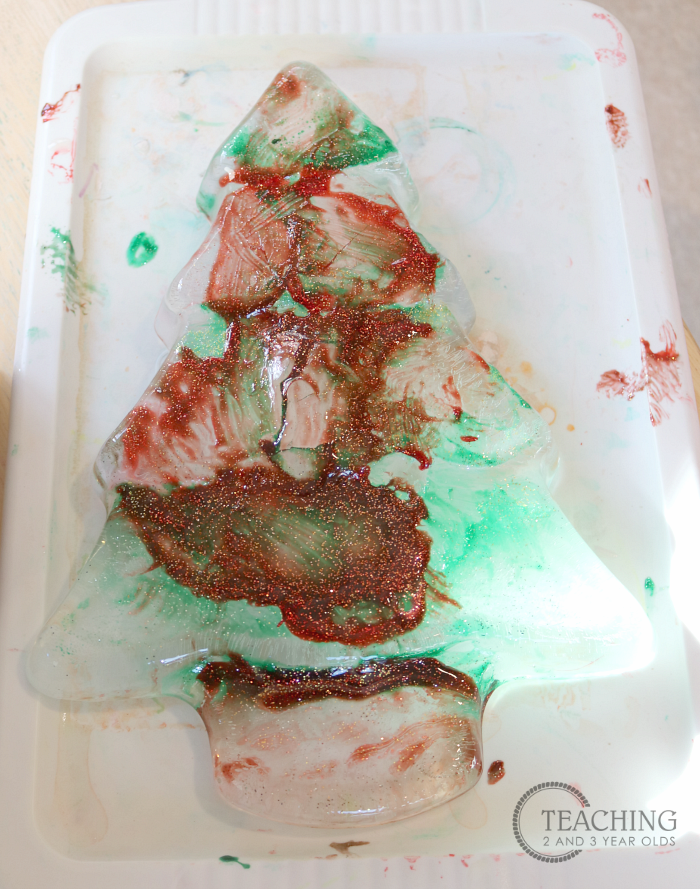
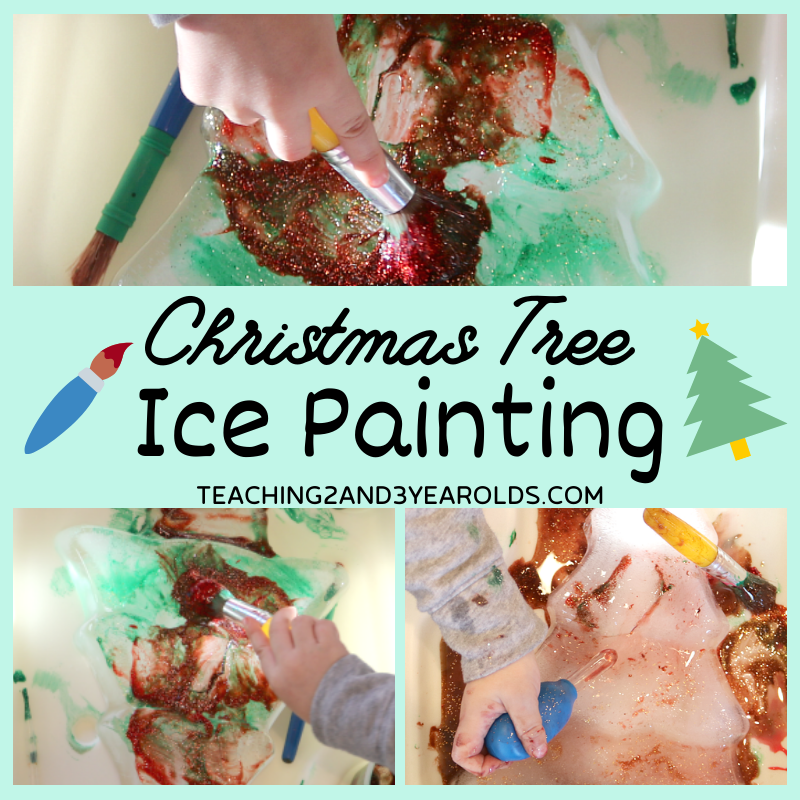
Instead, I recalled one of our most popular activities, painting on ice. I put a holiday spin on it by freezing water in Christmas tree shapes. I turned on some soft holiday guitar music, added paint, and invited my little friends to start painting.
Right on top of the ice.
You guys, if you are feeling the holiday craze in your home or classroom, you just might want to give this a try. It’s that good.
Toddler Christmas Tree Painting on Ice
Watch the Video
When I published my ice painting post, I had no idea it would go viral. I mean, really? It’s just ice and watercolors.
But then it dawned on me that was why it went viral. Because it’s so simple.
We crave simple, right? I mean, we love seeing all those cute crafts. But then we need to go purchase the materials, prep them, show the children how to use them.
Let’s face it. Painting on ice is so much easier. And perhaps even more fun. (My toddlers and preschoolers would say yes.)
Supplies
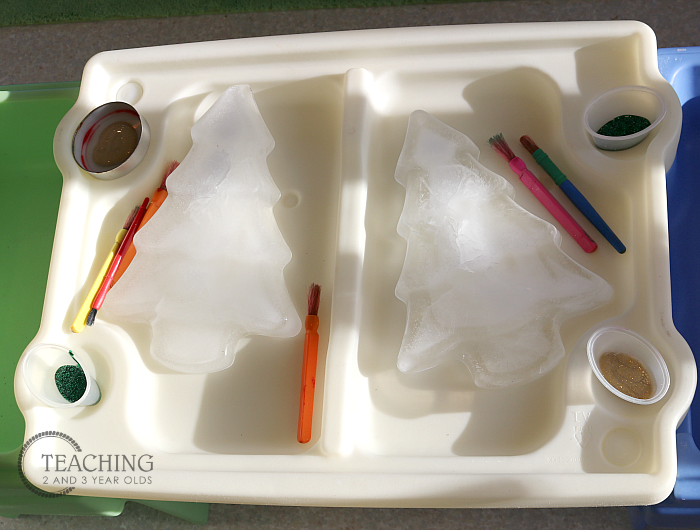
- Christmas tree cake pan
- Your choice of tempera paint
- Paint brushes
- Droppers (optional)
Note: If you don’t have time to get a tree cake pan, or if you don’t celebrate holidays in your classroom, you can simply freeze water in any plastic container, as we did in our original ice painting activity. It will still be just as fun!
Preparing the Activity
Make sure to allow enough time to freeze the water. Since we have 10 students and 1 cake pan, I had to repeat the process several times. (I froze 6 trees, since that’s how many spots we have at the art table. We then reused them for the rest of the children.) I did this at home, storing them in my kitchen freezer. On the morning of the activity, I put the frozen trees in an ice chest and brought them to the classroom. I removed them from the ice chest just before inviting our toddlers to paint.
Reusing the Ice
When 1 group of children was finished, we simply took the painted ice tree to the sink, ran cold water over it to remove most of the paint, and returned it to the art table. We were able to do this several times!
I placed our trees in our Simplay3 table, using the side that had edges. If you don’t have a table like this, place the trees in some sort of tray or pan with sides to contain the paint and water.
I added small containers of paint and brushes.
That’s it! (Simple process art is what we love!)

Christmas Theme Packet
- 9 Activities
- Download, Print, Enjoy!
The Invitation to Paint
When the children sat down at the art table, I invited them to touch the ice. How did it feel? Since this was my 2 year old class, they didn’t have a lot of descriptions except “It’s cold! It’s slippery!”
I then showed them how to take their paint brushes, dip them into the paint, and brush the paint on top of the ice tree.

Once they started painting, I could step back and just watch.
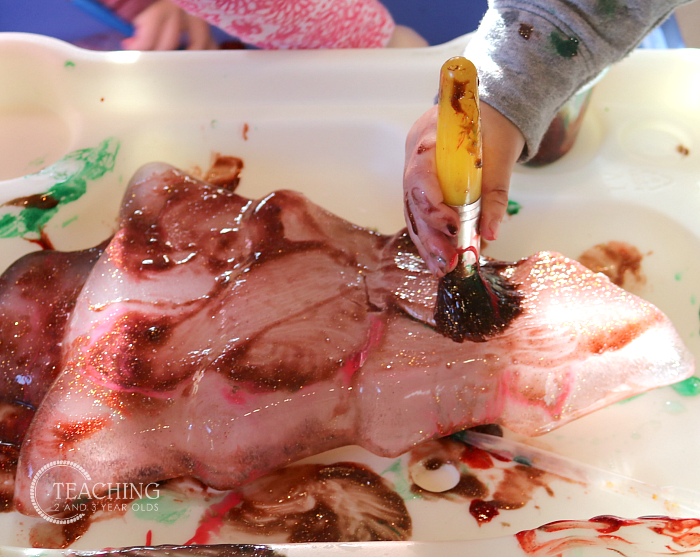
As the ice started melting, the colors started blending. This was fascinating for the children!
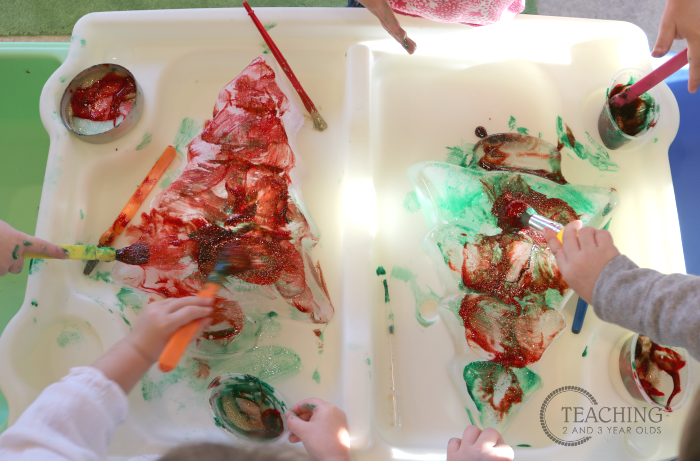
These types of activities keep young children busy for quite awhile. They can move their entire bodies as they stand around the table (we had no chairs).

This is true process art, as there is no end result.
However, you could press a piece of paper on top of the painted tree if you wanted to find out what type of print it would make. I opted not to do that this time, but did try it with our Valentine frozen heart art.
Using Droppers for Extra Fine Motor
At the last minute, while I watched the ice start to melt, I grabbed our favorite droppers and invited the children to squeeze the water from the tray and then release the water on top of the ice. This took the activity to a whole new level. As they squeezed the water on the paint, it started dripping off the tree.

Clean Up
Here’s the best part. Clean up is a breeze. Simply place the ice trees in the sink to thaw. I wish all art activities were this easy to clean up!

We loved this activity so much that we also did it with a gingerbread man theme!
Check it out here: Super Fun Gingerbread Activity Using Watercolors and Ice
Make sure to come back in a couple of months and try this activity with a Valentine’s twist!
But while we are still in December, you might enjoy these ideas:


FREE CIRCLE TIME PLANNER!
Get your FREE circle time planner as a gift when you subscribe to my free weekly newsletters.
Here is my Privacy Policy
What lovely ideas you have for small children. I’m teaching a family of 6 children of different ages with 3 and a 4 year old and up to 10 years old to paint with acrylics. I noticed that even the 3 year old paints the same picture as the older ones but of course she doesn’t stay within the lines but she still thinks it’s beautiful. She asked me if we can paint a snowman next visit and of course we will but for the older children there is more to the picture. It’s a service project for me and I love it.
Thank you, Marlene! I bet you are busy with those 6 children, but you are making such a difference in their lives!
Finally I found some quality information of child education. Thank you for sharing information like this.