
Last Updated on September 28, 2025 by Sheryl Cooper
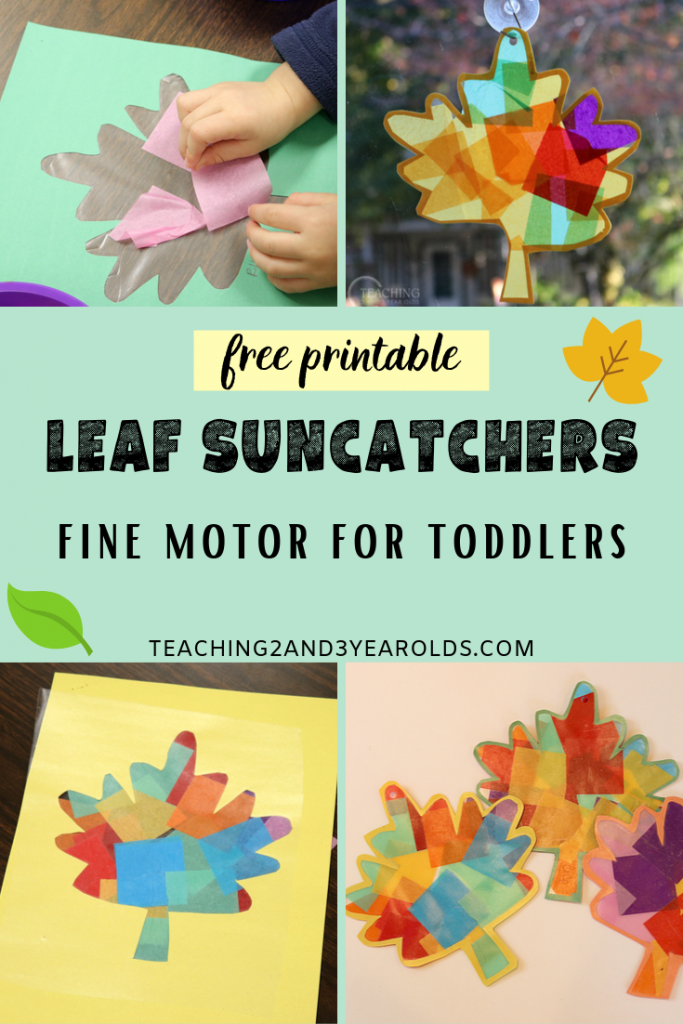
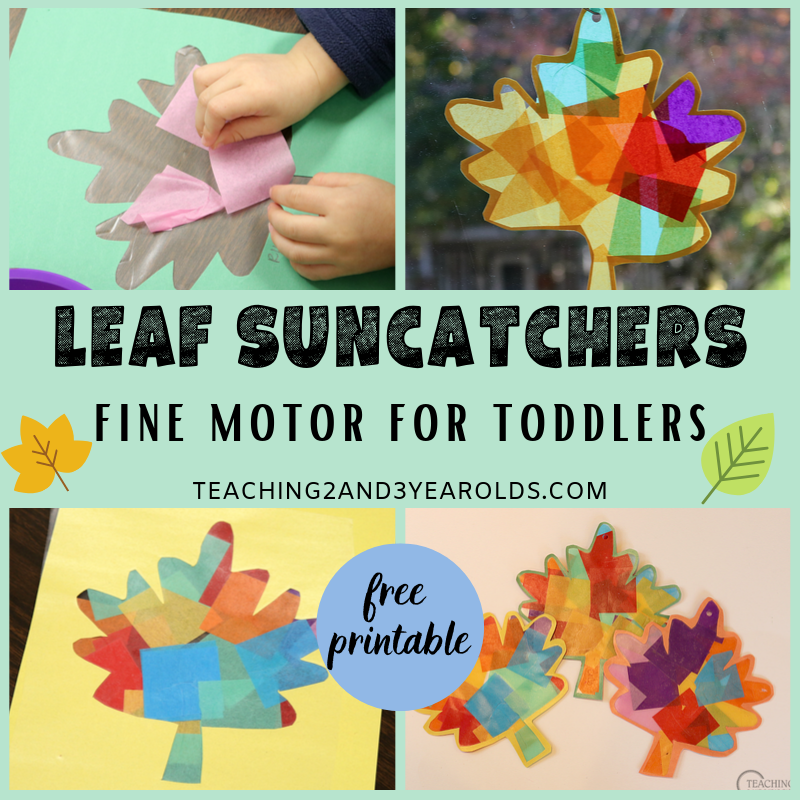
Inside: Toddlers love making this fall leaf suncatcher, and it’s a great way to strengthen fine motor skills. They add so much color to the window, too!
Fall is so colorful, so I always want to add more of it to our classroom.
We are lucky to have huge windows and I love being able to display the children’s artwork in them.
Especially colorful art work, like a fall leaf suncatcher.
This activity is not only easy and fun, but it’s also a great way to work on those fine motor skills, getting the hands and fingers ready for future writing.
👉 I’ve included a leaf template below to make this activity even simpler to assemble!
How to Make a Colorful Leaf Suncatcher with Toddlers
Watch the Video
Supplies
Leaf template (available below)
Preparation
Cut a leaf shape from the construction paper. I used an X-acto knife so that I didn’t have to cut from the side of the paper to get to the leaf shape. You could also poke a hole with scissors to get the shape started and then cut the leaf out.
I then cut a piece of Contact paper a bit larger than the size of the leaf and placed it sticky side down on one side of the construction paper, completely covering the leaf shape.
The Activity
During circle time I read One Leaf, Two Leaves, Count with Me! (This is a fun book that takes you through the seasons and the counting is a great way to work on simple math skills.)
I then invited the children to join me at the art table.
I had the sticky leaf paper ready to go as well as shallow containers of colorful tissue paper squares.
Just like when we made our rainbow sun catchers, I showed the children how to feel what part was sticky, and to then press the tissue paper onto it.

I showed them how to take one tissue paper square at a time, as some of the children wanted to put a handful on top.

This leaf sun catcher activity was a fun color recognition idea as well.
I would ask who had orange, who had blue, who had purple?
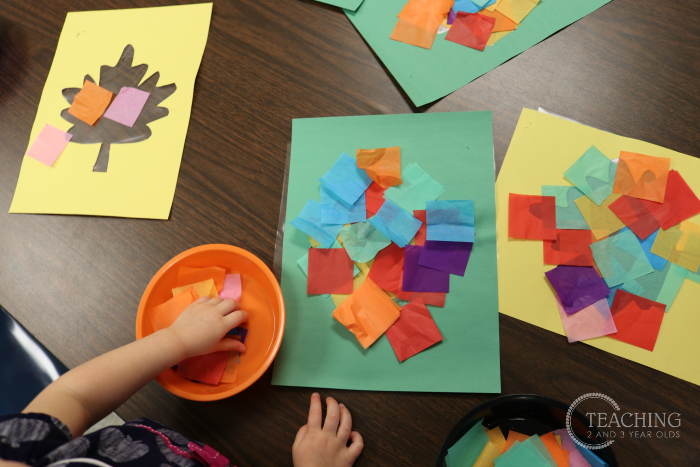
I encouraged the children to cover all of the sticky parts, but some chose to only put a few squares on.
It’s their artwork, so I let it be.

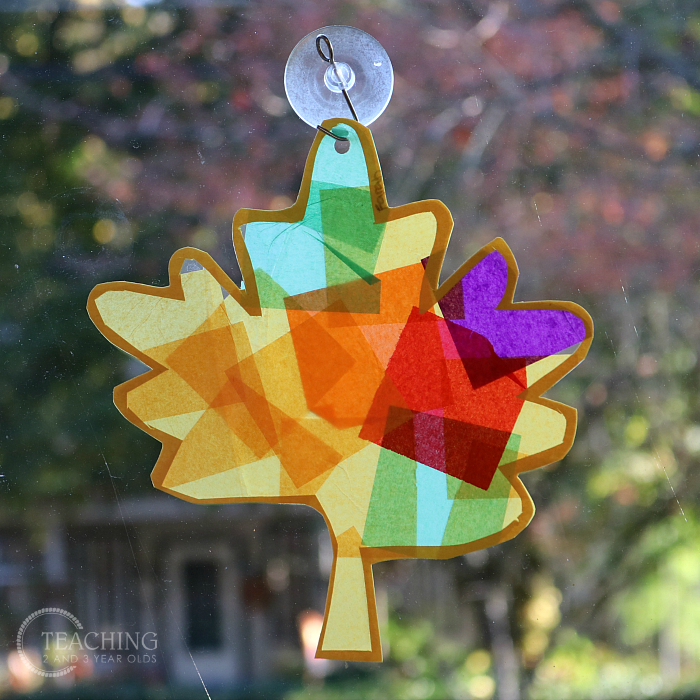
Once the children were finished, I took another piece of Contact paper and covered the tissue paper squares.

I then trimmed around the leaf, leaving a bit of construction paper as a trim.

We have two windows in our classroom, so I used a hole punch at the top of the leaf so I could hang them on suction cups with hooks. (I love these hooks for displaying art work in our window all year long!)
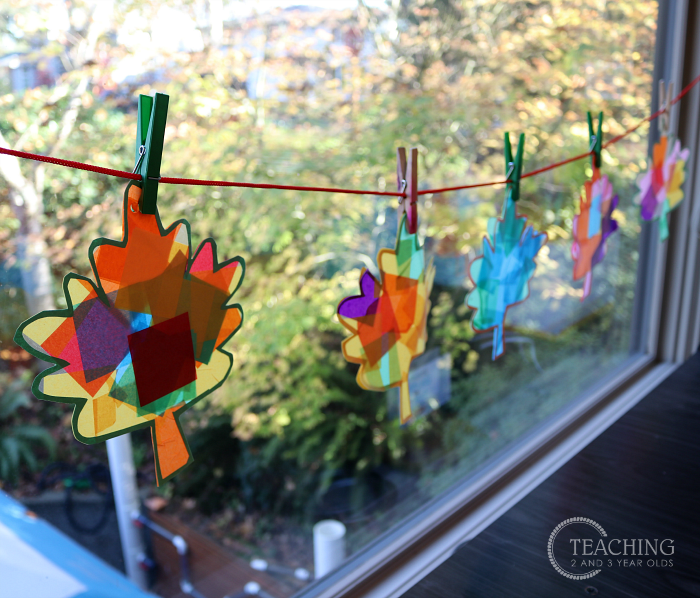
I also created a banner by hanging a rope across one of the windows and securing the leaves using clothespins.

I just love how the color shines through these leaves!
Leaf Books
Free Leaf Printable


More Leaf Activities
Circle Time – Leaf Props (Free Printable)
Table Activity – Leaf Matching (Free Printable)
Art – Watercolor Leaves
Art – Sponge Painted Leaves
Math – Leaf Count & Clip (Free Printable)
Collection of Leaf Activities

FREE CIRCLE TIME PLANNER!
Get your FREE circle time planner as a gift when you subscribe to my free weekly newsletters.
Here is my Privacy Policy