
Last Updated on August 30, 2025 by Sheryl Cooper
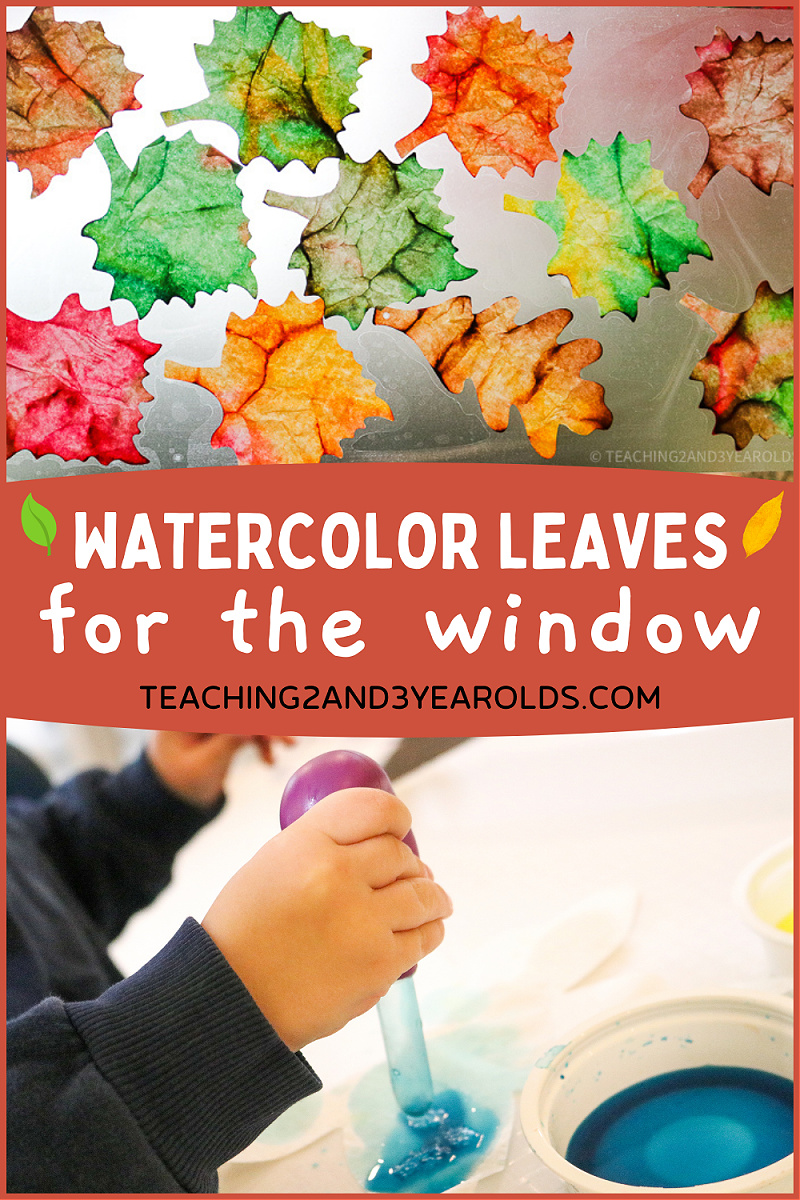
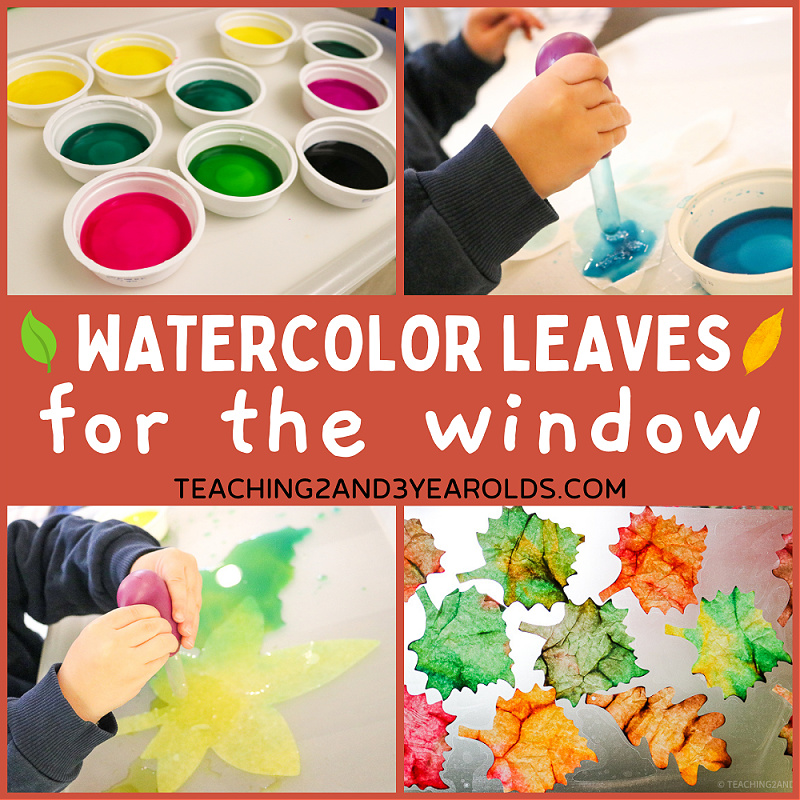
Inside: Creating watercolor leaf art is a fun way to work on fine motor skills. Press onto sticky paper and you have a beautiful window display!
Fall is the perfect time to add leaf art to your day!
After observing the many colors of leaves in your neighborhood, invite your toddlers and preschoolers to create their own leaves with vibrant watercolors.
Using droppers strengthens the hands and fingers, getting them stronger for writing.
Busy kids love the action of squeezing and releasing paint onto their tissue paper leaves.
And the result? A colorful piece that can hang in your home or classroom window!
We make some version of leaf art every fall.
One year our toddlers used sponges to paint paper leaves. Another year we made leaf suncatchers.
While making leaf creations we also read leaf books, sing leaf songs, and go for a nature walk to collect leaves for our science table.
This year I decided to use our tissue paper leaves and watercolors technique and create a window display that not only could we enjoy, but also anyone passing our classroom window outdoors.
Decorating the Classroom
We love decorating our classroom with the children’s artwork!
I especially enjoy displaying their pieces in the window.
The colors make the room so cheerful!
Some window displays we’ve done in the past:
Related: Easy Ways to Decorate the Classroom With the Children’s Work

What I really love about this leaf art activity is that it’s easy and also builds important skills, such as:
- Fine motor (squeezing and releasing the dropper)
- Color blending (we use a variety of colors)
- Hand-eye coordination (directing the dropper from the container of paint to the tissue paper leaf)
Prep is simple, too. (We busy teachers love that!)
Colorful Tissue Paper Leaf Art {For The Window!}
Watch the video:
What you will need:
- Liquid watercolors (we used fall colors)
- Droppers (we love these for toddlers and these for preschoolers)
- Containers for the watercolors
- Trays (to catch the puddles)
- Tissue paper leaves
- Con-tact Paper
- Trays

Preparing This Activity
Fill shallow containers with liquid watercolors.
Set up your art table so that each spot has a tray and place the watercolors nearby, along with the droppers and tissue paper leaves.
You can see how our table is set up in the photo below:
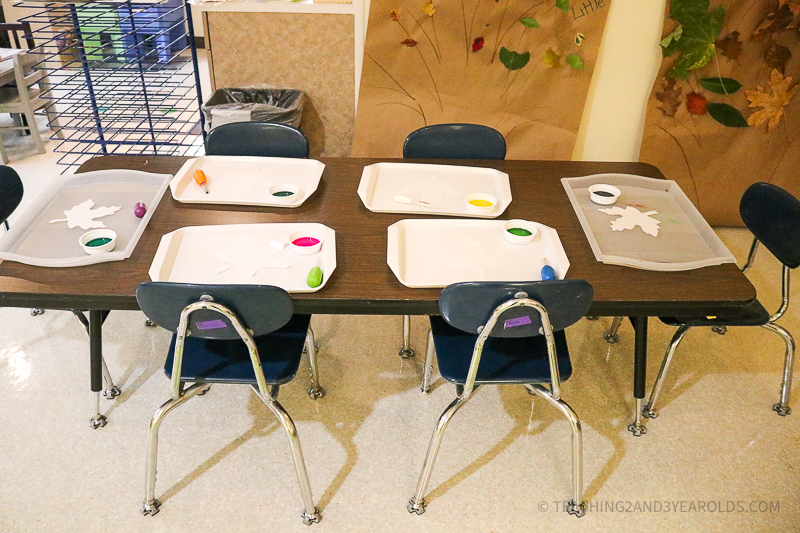
See how simple that looks?
Now it’s time to invite your children to paint their leaves!
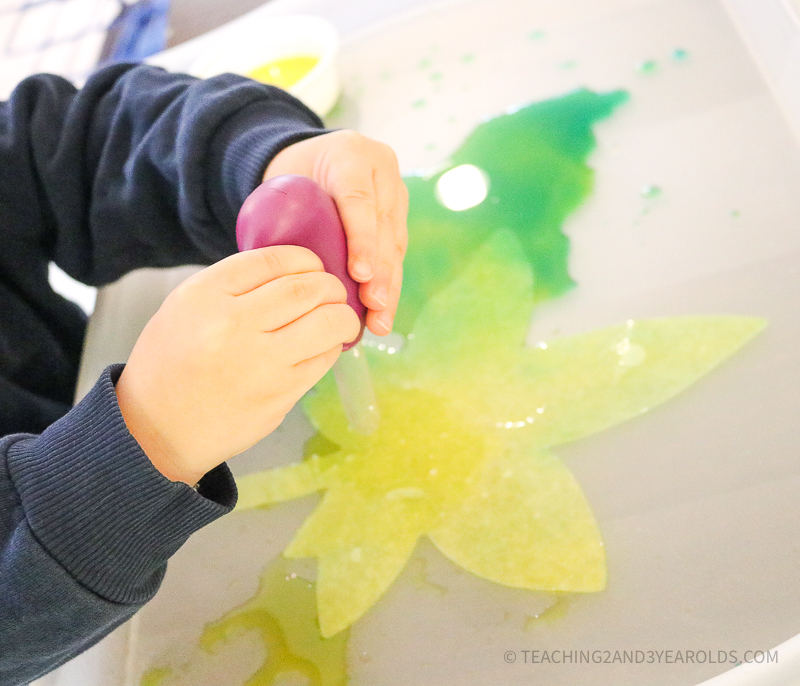
Using Droppers
As I said earlier, using droppers is one of my favorite ways to strengthen the hands and fingers.
I use droppers with larger bulbs for toddlers.
They will often start using two hands.
Then, they will move to one hand.
Related: 25+ Toddler Fine Motor Activities

If this is your toddler’s first time using droppers, show them how to dip them into the paint, squeeze, transfer the dropper to the leaf, and release.
This might take a few tries, so give them that time.
Have them look at the dropper’s tube, noticing the watercolors moving up and down.
If you are working with those who have strong fine motor skills – especially if they are preschoolers – you can use pipettes.
The bulb is much smaller, encouraging children to use their thumb and finger rather than palm.

Painting the Leaves
Once your children get the hang of using the droppers, they will cover their leaves with watercolors.
Invite them to try a new color so that there are at least two colors blending on the tissue paper.

For example, when this toddler used yellow and blue watercolors, he noticed they blended to make green!
A fun way to explore color mixing.
When Finished
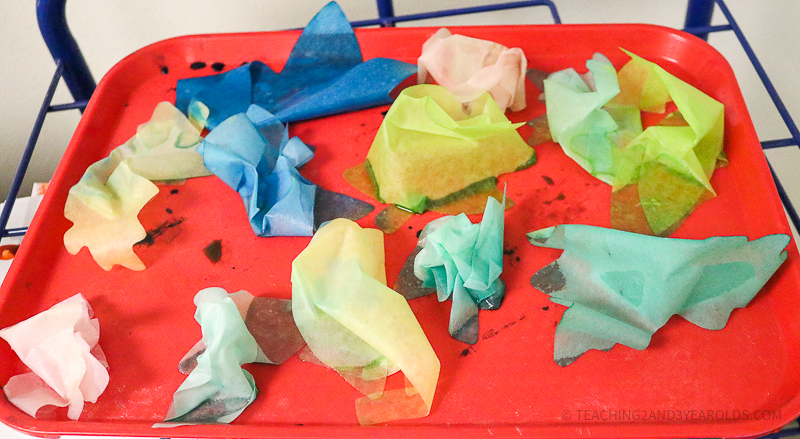
As each tissue paper leaf is painted, place on a tray.
I like to wad the leaves up a bit as this creates streaks of darker color when dry.
Creating a Leaf Art Window Decoration
Once leaves are dry, flatten them.
Cut a large section from your roll of Con-Tact paper, taping onto the table sticky side up.
Place the leaves next to the sticky paper.
Related: 15 Contact Paper Activities

Have the children press their leaves on the sticky paper.

Display in the Window
Once all the leaves pressed on the Con-Tact paper, remove the tape and carry the entire sheet to the window.
Press the sticky side of the paper to the inside of the window.
Here is ours:

Here is another classroom’s work:

The darker veins occurred when the leaves were wadded up while drying. Isn’t it a nice effect?
Books to read with this activity:
Songs to sing:
Five Little Leaves (Lynn Kleiner)
Four Golden Autumn Leaves (All Together Music)
Autumn Leaves Are Falling Down (The Kiboomers)
Autumn Leaves (The Learning Station)
Leaves on the Tree (The Learning Station)
You can also find these on my Spotify November Playlist:

Don’t forget to use these free props during your leaf circle time, too!
More Leaf Activities


FREE CIRCLE TIME PLANNER!
Get your FREE circle time planner as a gift when you subscribe to my free weekly newsletters.
Here is my Privacy Policy