
Last Updated on September 6, 2025 by Sheryl Cooper
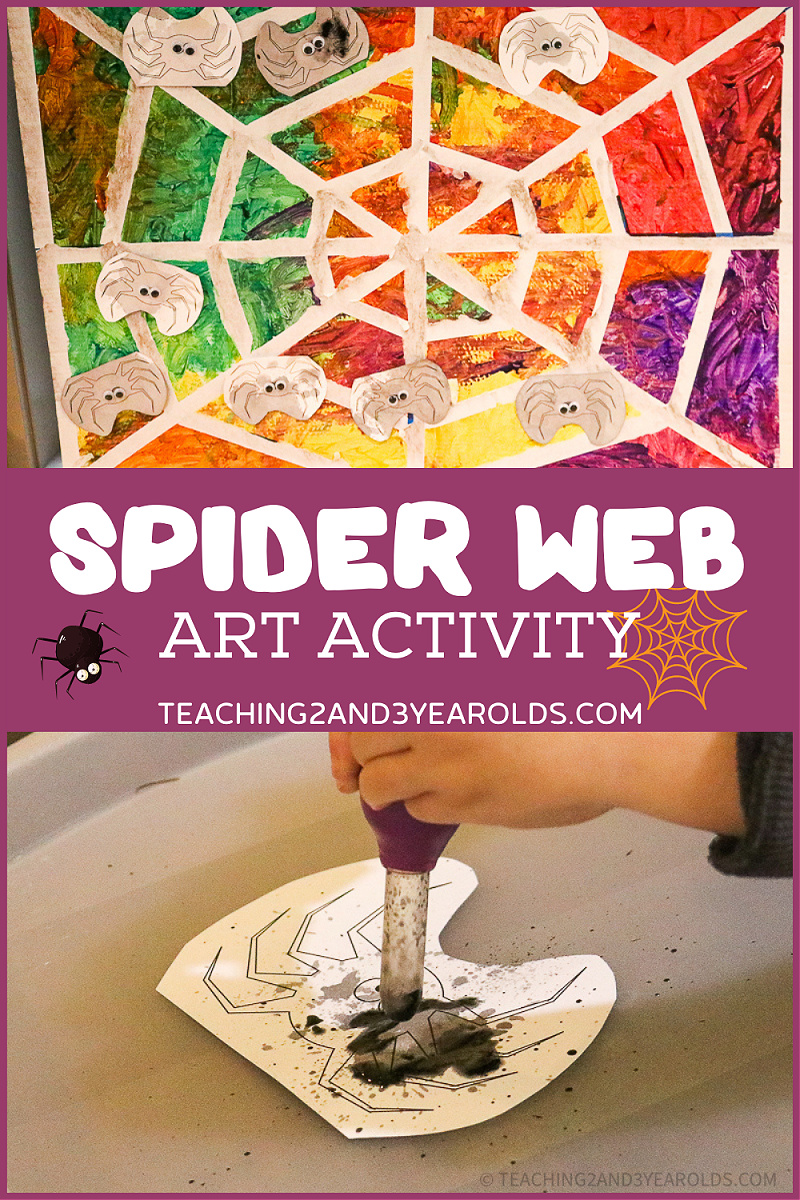
Inside: This spider web art activity is actually two different projects wrapped into one. The result is a colorful tape-resist web with painted spiders attached!
Fall is a great time to explore spiders, so why not include them in an art activity?
We took my free spider printable and squeezed paint onto them, then created a vibrant, colorful web.
Once we added our spiders to the web, we displayed them on our classroom wall.
The children loved pointing out their spiders as they admired the web!
If you’ve been following Teaching 2 and 3 Year Olds for awhile, you know that I love to reuse what we already have.
That includes printables!
When I was filling out my planner for October, I remembered a spider printable that I had created a few years ago when we made our Itsy Bitsy Spider Puppets.
I also wanted to work on fine motor strengthening using one of my favorite tools, the dropper.
As I was putting this idea together, one of the other teachers in our preschool had invited her students to create a tape-resist spider web.
That’s when the entire idea came to life in my head.
Create spiders AND a spider web!
And can I just say that I love how it all turned out?

Watch the video:
Spider Web Art Activity
What we used for the spiders:
- Black tempera paint, thinned a bit with water
- Droppers
- Free spider printable (scroll down to find link)
- Googly eyes (optional)
What we used for the web:
- Cardboard (ours was white)
- Tempera paint in assorted colors
- Painters tape
- Paint brushes
Two Step Process
This spider web art activity is done in two steps, most likely on two different days.
We first made our spider web using a tape-resist method, and then we painted our spiders.
I love activities that are done at different times.
Some examples:
Sometimes each step focuses on different skills, too.
In this spider web art activity, the first step (web) focuses on painting with a brush, with some color mixing going on.
The second step (spiders) focuses on fine motor skills using a dropper.
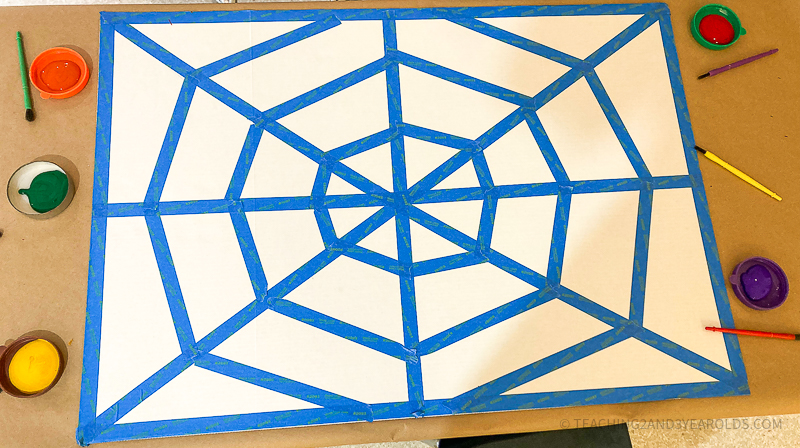
Tape Resist Spider Web
There is some prep work putting the spider web activity together.
Creating the Web
Cut or tear the pieces of tape down securely on the cardboard. This lessens the paint from seeping under the edges.
The Invitation
Provide different colors of paint, along with paintbrushes.
Set them next to the web and invite your children to paint the entire piece.
Our cardboard was large enough so a group of children could work together.
Note: We like to pull the chairs away from the table, making it easier for the children to move around while painting the entire piece.
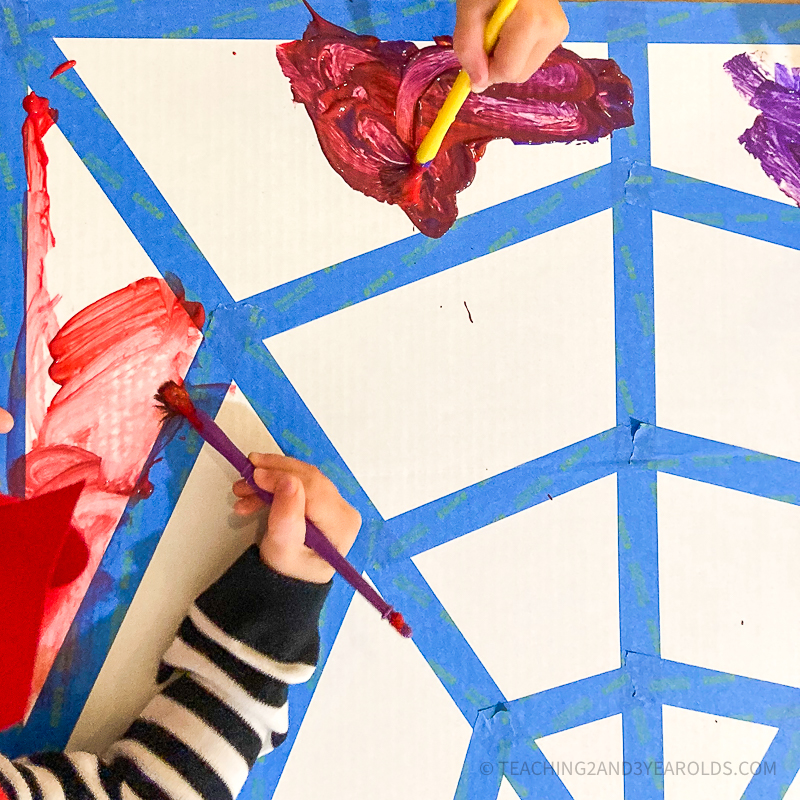
Working together allows the children to navigate shared space while also becoming involved in discussions. An important part of building communication skills!

When Finished
After the paint has been applied to the cardboard, the tape can be lifted right away, or you can let the paint dry first.
Yes, there still might be some tearing. I am asked this question a lot, and I will honestly say that I haven’t perfected this step.
However, I don’t think some tears ruin the results.
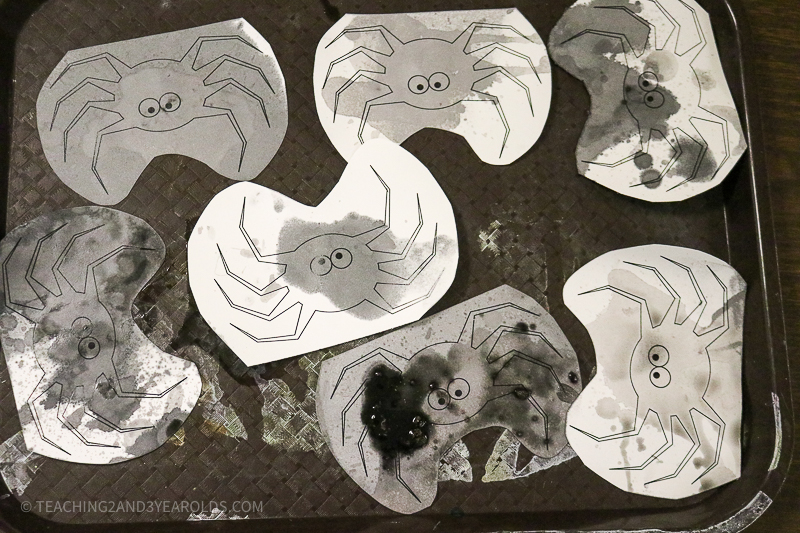
Painting the Spiders
Step two of this activity involves painting the spiders.
As I said earlier, I wanted to focus on the fine motor part.
Since this was done early in the school year, we hadn’t had much experience using droppers.
I absolutely love droppers for strengthening the hands and fingers, and we use this process a lot throughout the school year.
Some examples:
- Watercolors on Paper Towels
- Watercolor Tissue Paper Snowflakes
- Valentine’s Day Hearts Water Activity

Setting It Up

Make enough copies of the spider printable so that each child has at least one.
I say this because some of our children absolutely love being at the art table and often want to create multiple pieces.
I printed ours on heavy (card stock) paper to make them more durable.
Cut around the spiders.
Provide containers of black tempera paint that has been diluted a bit with water. If the paint is too thick it will have a harder time traveling up and down the dropper, frustrating the children.

The Invitation to Paint the Spiders
If your children have not used droppers before, make sure to demonstrate how to dip it into the paint, squeeze, and then transfer it to the paper, releasing the paint.
For some children (especially toddlers), this might take awhile. If your children do not have the strength to accomplish this part, you can replace the droppers with a paintbrush.
But give them time to try first.

Benefits of Using Droppers
I love using droppers for fine motor because they are wonderful for isolating the fingers that are using for writing.
They also are important for practicing coordination and control as the droppers need to be filled with paint, transferred to the paper, and then released.
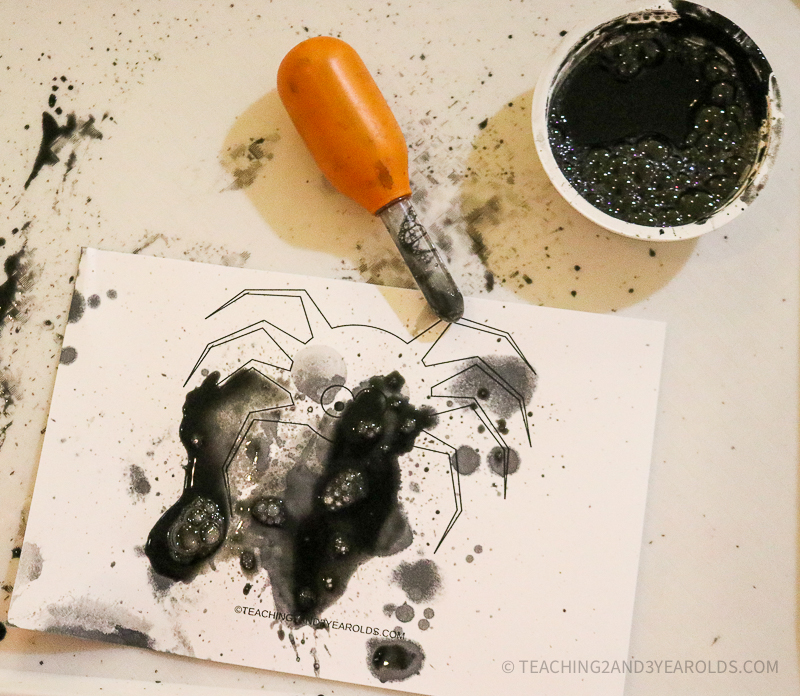
The entire spider does not need to be covered.
Some of our children were happy to partially cover theirs, while others covered the entire spider with paint (and then some!).

When Finished
Place the painted spiders on a tray to dry completely.
You can then add googly eyes if desired.
Putting the Spiders On the Web
Roll some tape on the backs of each spider and have your children place them on the web.
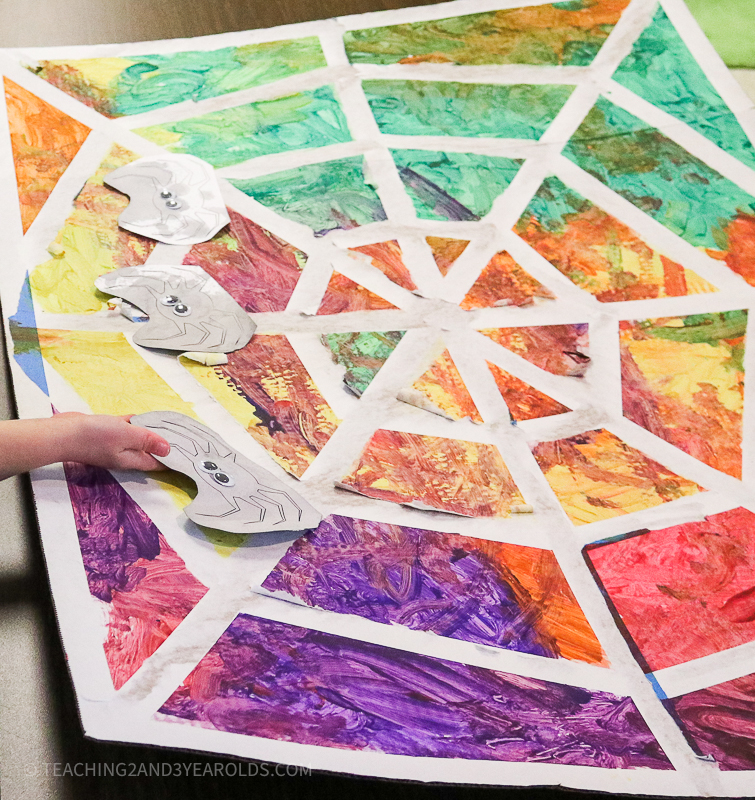
And now you have your spider web art!

Extension
Sing The Itsy Bitsy Spider during circle time!

Itsy Bitsy Spider Circle Time Activity
- Toddlers
- Preschool
More spider activities:
- Loose Parts Spider Light Table
- Itsy Bitsy Spiders at the Block Center
- Spider Science
- Spider Sensory Bin
- Spider Web Art
- Egg Carton Spiders
- Spider Puppets
- Spider Counting Snack

Click below to get the free spider download:


FREE CIRCLE TIME PLANNER!
Get your FREE circle time planner as a gift when you subscribe to my free weekly newsletters.
Here is my Privacy Policy