
Last Updated on November 18, 2025 by Sheryl Cooper
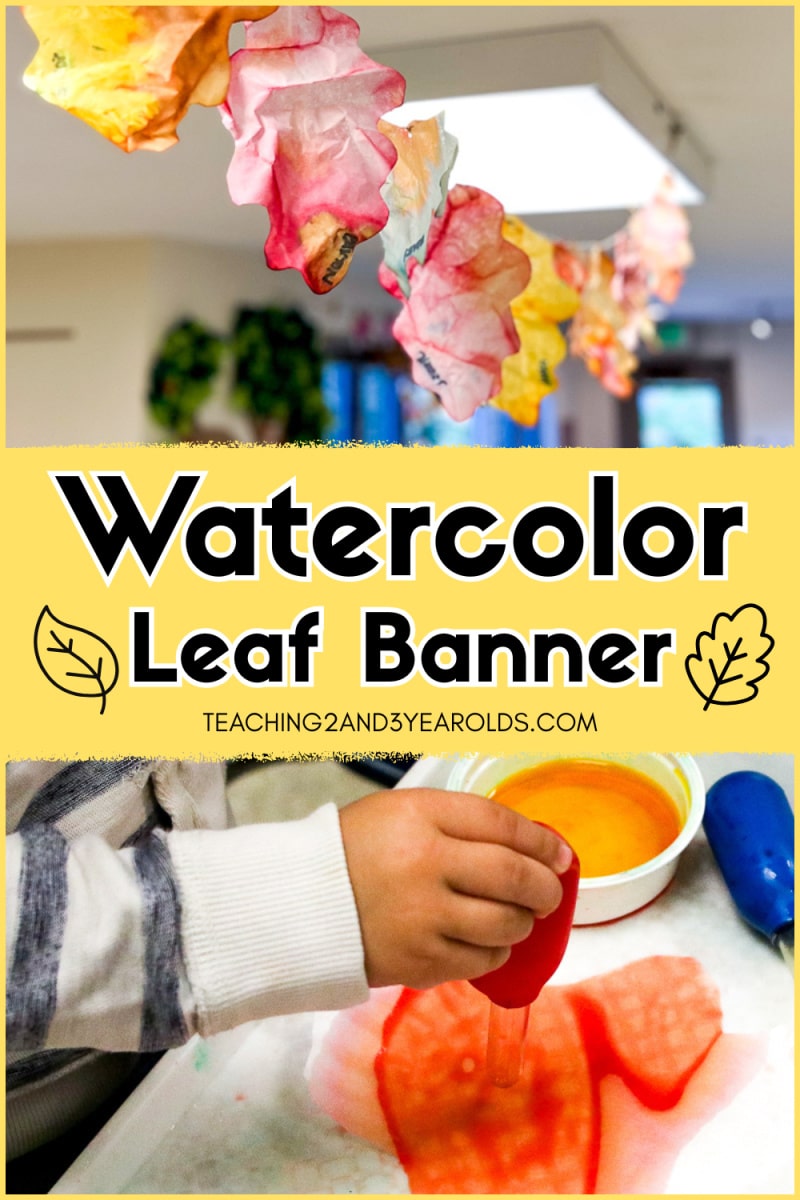
Inside: These watercolor leaves are made with coffee filters and add a nice fall touch when turned into a banner!
Watercolor leaves are a favorite to make at our art center every fall.
I shared the process in this post and then, a few years later, I used the same method and turned it into a window decoration.
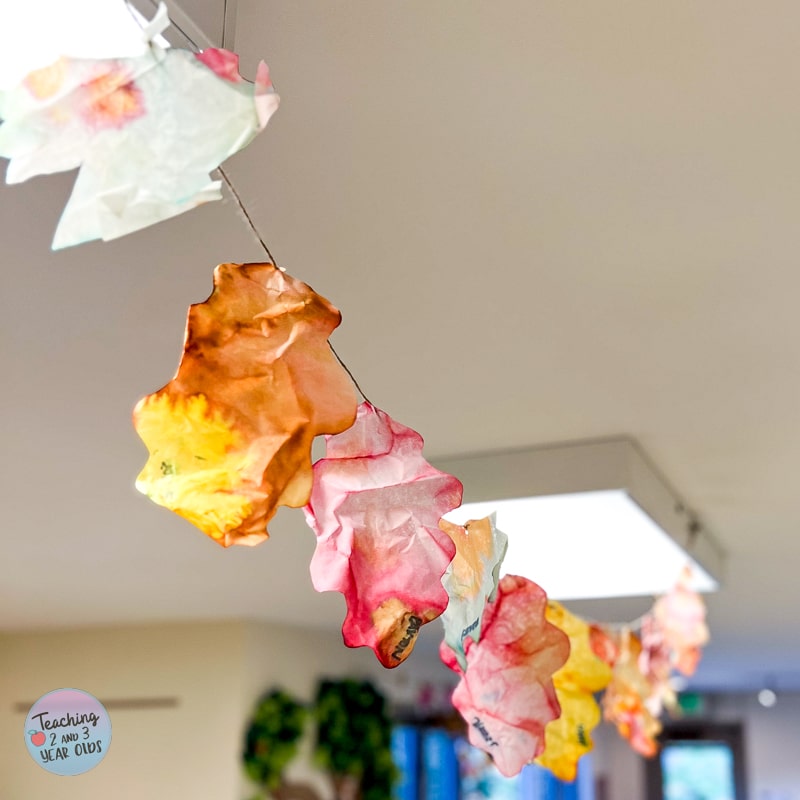
This year I decided to gather our watercolor leaves to create a fall banner that looked beautiful hanging in our classroom!
This banner is not only a nice decoration, but it also is an important fine motor activity, and I am always looking for ideas to strengthen the hands, getting them ready for writing.

Skills Being Developed
Fine Motor
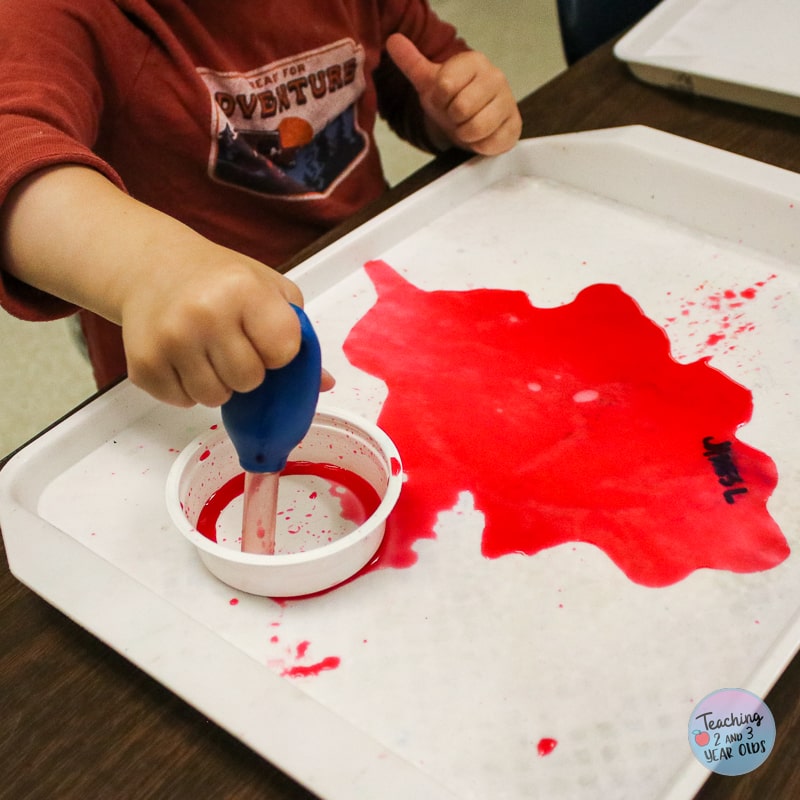
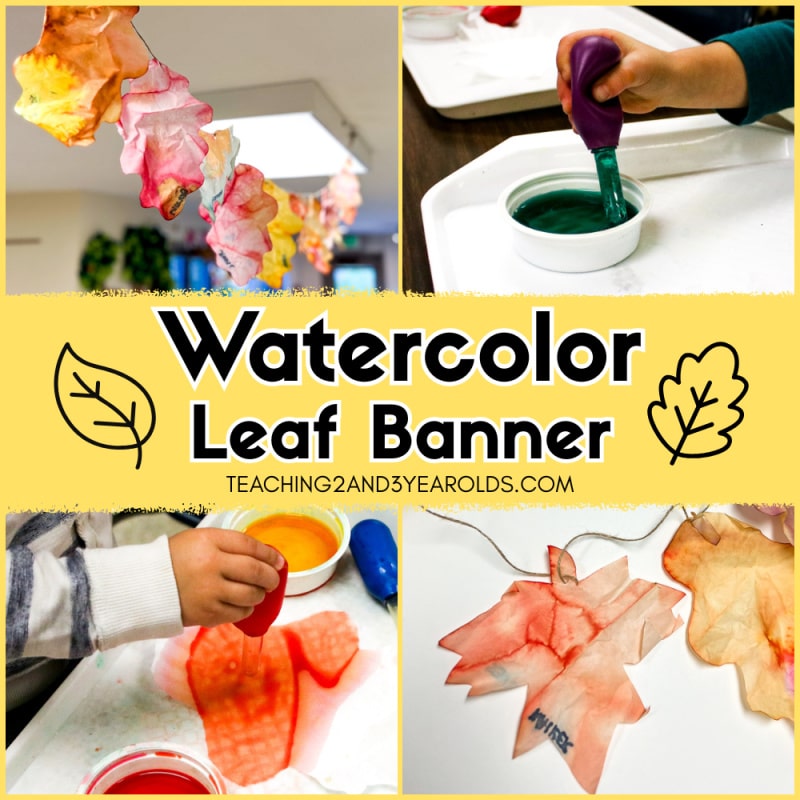
I chose to use droppers rather than paint brushes with this activity because it’s an extra fine motor challenge. Our two’s class uses wide-bulb droppers and the older classes use pipettes.
Benefits of Using Droppers:
- Separates the thumb, index, and middle fingers from the rest of the digits
- Works on eye-hand coordination
- Encourages open web space (hand arch development)
Related: Fall Fine Motor Activities
Color Recognition
Providing different colors encourages children to identify them, especially when they are sharing with other children. (“I need the yellow, please.”) Also, when more than one color is used, it’s fun to see what happens when those colors merge. What new colors are being made?
Before this Activity
Before we did this activity, we explored the color of real fall leaves on our science table. We noticed their colors, shapes and sizes.
Then, we read some books.
Leaf Books
Colorful Watercolor Leaves
Watch the Video
So let’s get down to how we made these leaves and turned them into a banner!
Supplies
- Coffee filters – Make sure they are at least the size of the leaf template you will be using. I used commercial coffee filters.
- Leaf template – I used the leaves from our fall tracing packet.
- Liquid watercolors in assorted fall leaf colors
- Droppers (toddler) or pipettes (preschool)
- Trays
- String
- Scissors
- Hole punch
Preparation for Watercolor Leaves
Cut desired amount of leaves from coffee filters.
Pour watercolors into individual small containers, diluting with water until they are desired strength.
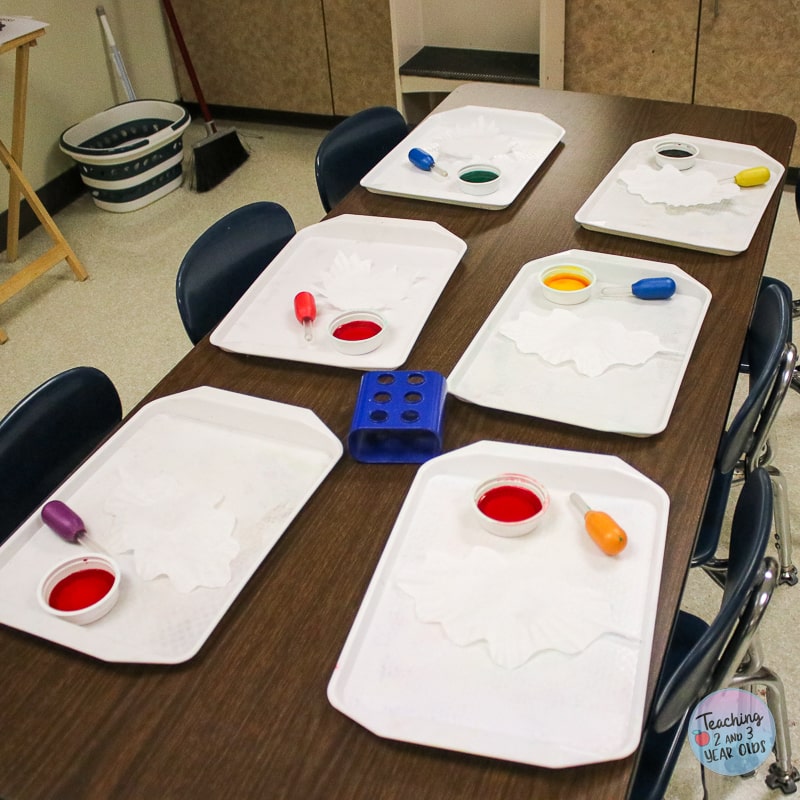
Set Up
Place trays at the art table.
On each tray have:
- One leaf
- Dropper
- Watercolors
The Activity
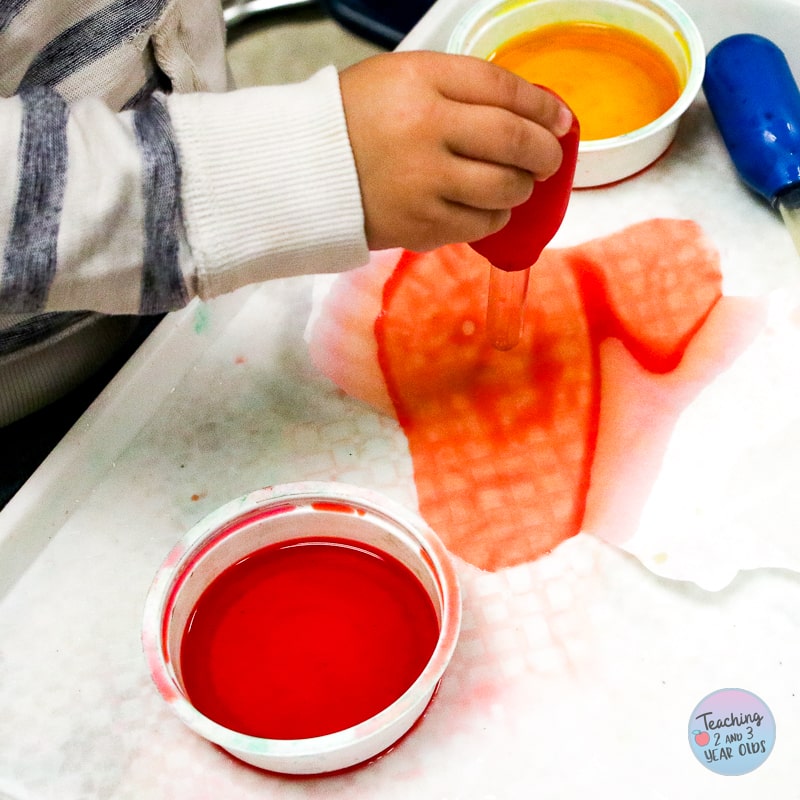
Invite your children to transfer watercolors from container to the leaves.
If they have never used droppers before, show them how to squeeze the bulb when the dropper is in the watercolors, direct it over the leaf, and squeeze again to release the watercolors.
This might take some time to get the hang of, so give them that time to practice.
Eventually they will get a feeling for the squeeze and release method.

Encourage them to switch colors with someone else about halfway through, so that there are multiple colors on their leaves.
Some of my students didn’t want to do this, and that was fine.
I simply suggested and some said yes while others declined.
TIP: When the container of watercolors is empty, most of it will be on the tray. (Which is why you need a tray with sides!)
When a child is finished with their leaf, have them place it on another tray to dry.
Over a sink (to catch any spills), tip the tray so that the excess watercolors pour back into the container to be used by someone else.
Let leaves dry completely.
Assembling the Banner
Punch a hole in the stem of each leaf.
Loop the string through each leaf’s hole as shown below.
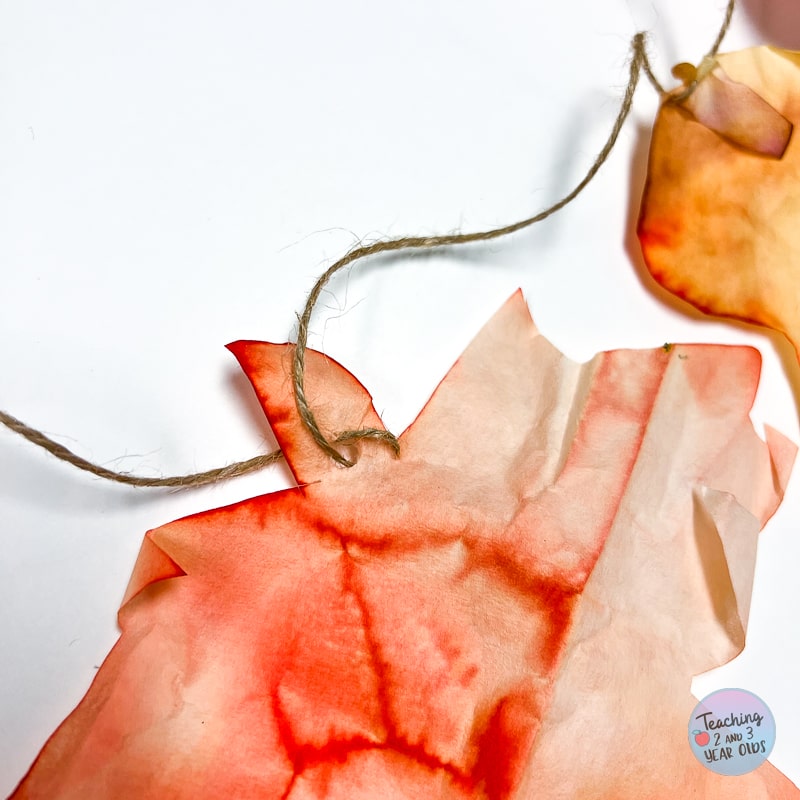
After each leaf is attached to the string, create loops at either end and hang.
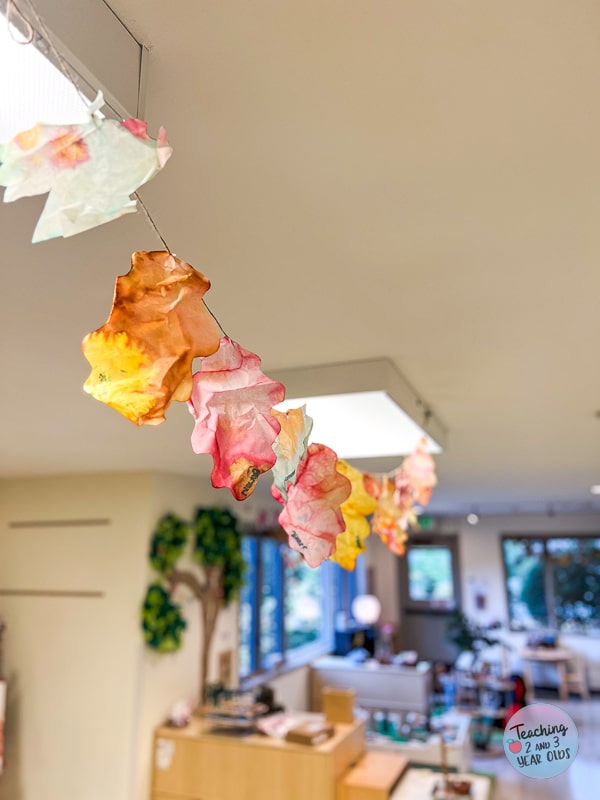
I love the way they turned out!
How to Modify for Older Preschoolers
After looking at different real leaves (perhaps having them sitting on the art table), invite your older preschoolers to draw their own leaves on coffee filters and cut them out.
As mentioned earlier, use pipettes instead of droppers for more of a fine motor challenge.


FREE CIRCLE TIME PLANNER!
Get your FREE circle time planner as a gift when you subscribe to my free weekly newsletters.
Here is my Privacy Policy