
Last Updated on September 27, 2025 by Sheryl Cooper
Inside: How do you turn a pumpkin craft into a keepsake Halloween magnet? Come see how our 2 and 3 year olds had fun mixing colors to make something special to take home!
We’ve been a bit pumpkin crazy in our classroom lately.
But after last week’s pumpkin prints activity, we just sort of kept on going and ended up creating a pumpkin craft that turned into a keepsake magnet.
Since I know how much this particular group of 2 and 3 year olds loves getting their hands in paint, I knew we had to use the same process.
We ended up with a cute pumpkin magnet with lots of buttons and sequins!

How to Create a Pumpkin Craft that is a Keepsake Magnet
I confess that there are times when something I plan takes a different route once the children get started.
It’s just something that happens while I am observing what’s taking place during the process.
This pumpkin craft is a perfect example.
Originally I had planned for the children to paint their wood pumpkins orange using a brush.
However, once we got going with our pumpkin prints, I had this sudden idea to toss the wood pumpkins on the very same foil they had made their prints, letting the children use their fingers to paint them.
Watch the Video
Supplies
- Tin foil
- Red washable tempera paint
- Yellow washable tempera paint
- Wood pumpkins
- Buttons
- Sequins
- Glitter glue
- Modge Podge, gloss finish
- Magnetic pieces
- Tacky glue
Step 1: Painting the Pumpkins
Note: You can skip the foil and just have the children paint the pumpkins with brushes.
I first invited the children to mix yellow and red paint on top of the foil. You don’t need to use foil – I just like it’s slick texture.
We started this activity when making our pumpkin prints, and once the paint was mixed, I set the wood pumpkins on top.

The children used their hands to rub the now orange paint all over the wood pumpkins.
I used one large sheet of tin foil and had several children working at once on it.
You could easily do this as an independent activity as well.

I removed the pumpkins from the foil and let them dry completely.
Step 2: Adding the Details to the Pumpkin Craft
I love using glitter glue tubes because they fit nicely in small hands, and (usually) the contents don’t come out too quickly.
We had assorted colors so the children chose which they wanted on their pumpkins, squeezing the glitter glue on top.

I placed the buttons and sequins in containers and showed the children how to press them into the glue.
(Yes, some other small assorted pieces got in there, like wiggly eyes and pony beads. That’s what happens when we use our materials for so many different activities!)

After placing some pieces on the glue, the children decided if they needed more glue.
The squeezing action is a nice fine motor activity, and you know how I love that!
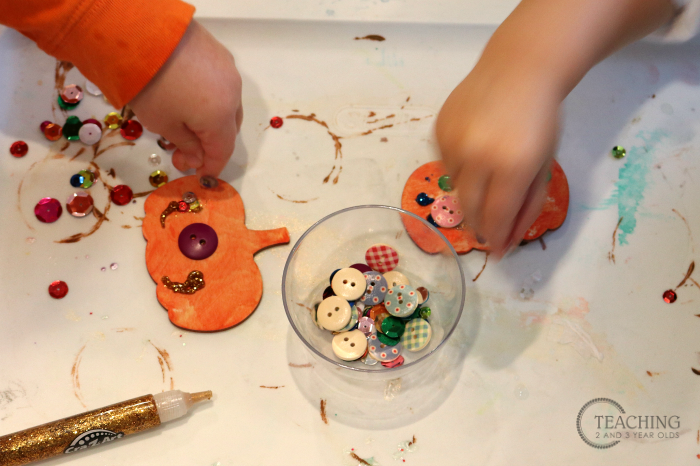
I must also add here that because the pieces are small, I was right there the entire time, making sure none were put in mouths. We can never be too careful!
If you are concerned about this, skip adding the pieces. The shimmer of the glitter glue is a nice touch by itself!

Step 3: Finishing this Pumpkin Craft
When completely dry, I added a magnet to the back and then brushed some gloss Modge Podge over the front of the pumpkin.
This helps secure the buttons so they won’t pop off, plus it gives everything a nice shine.
I then added a magnetic piece on the back. I used Tacky Glue so it would be a stronger adhesive than school glue.
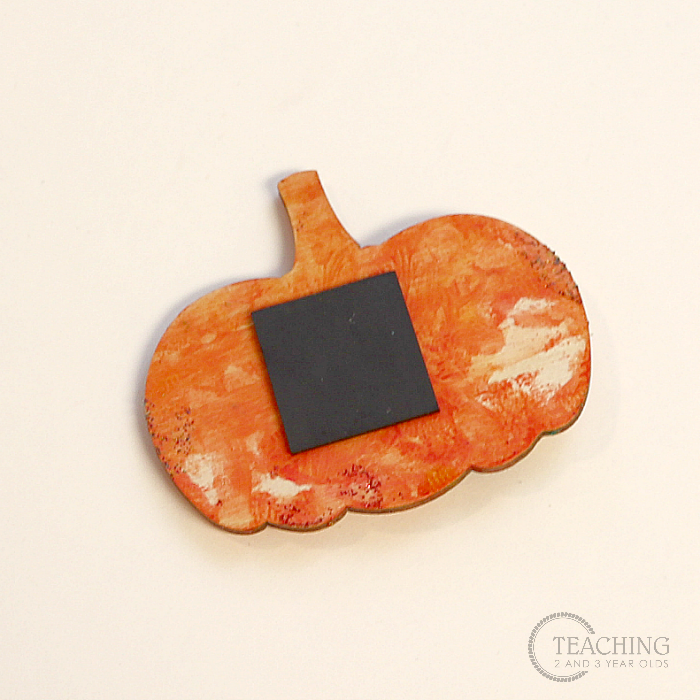
I made sure to write the children’s names on the back of the pumpkin with a permanent pen, as well as the year.
As a parent of grown children, trust me that they will never remember what year these were made if they choose to save them.

And there they are! A fun pumpkin keepsake magnet!


FREE CIRCLE TIME PLANNER!
Get your FREE circle time planner as a gift when you subscribe to my free weekly newsletters.
Here is my Privacy Policy