
Last Updated on November 13, 2020 by Sheryl Cooper
Inside: It’s easy to make a preschool Christmas ornament to use as a gift for parents or other special people. Add some fun buttons and the child’s photo, and it’s a keepsake item to be cherished for years!
Parents love keepsake ornaments.
I don’t love super crafty things that take a lot of my time putting together and then watching the children’s every move to make sure it looks “right”.
In fact, if you’ve been following my blog for awhile, that is so NOT my style.
So every year I look for a preschool Christmas ornament that is easy for me to put together and allows the children to add their own touches.
I was really pleased with how this photo keepsake ornament turned out, and the preschoolers had fun with it, too!

How to Create a Preschool Christmas Ornament {as a Gift}
It all started with a late night check in on Amazon.
How many of you can relate?
In November I started searching for Christmas crafts on Amazon and came across these wood ornaments.

I knew immediately that they would be perfect to use with the keepsake photo ornament I had in mind for my 2 year olds.
And because there were 3 times the amount I needed, I shared with my co-teachers. (I can’t wait to see what they do with them!)
I wanted this preschool Christmas ornament to include a photo, because I have done a photo ornament with my students for the past 15 or so years.
You might recall this keepsake ornament we did last year.
What you will need:
- Wooden ornament
- Assorted Christmas buttons
- Washable glitter tempera paint
- Glossy Mod Podge
- Photo of each child making the ornament
Getting everything ready:
I first took a photo of each child standing in front of lit Christmas trees in our gym. I gave them the option of wearing an elf hat, and all but one child declined.
Then, I edited the photos using Canva, adding our school’s name and the year.
(I’ve blurred parts of the photo for privacy reasons, but they were crystal clear for the ornament!)
I put the photo in a circle format, making it slightly smaller than the ornament.
I had everything ready to go on the day this activity took place.

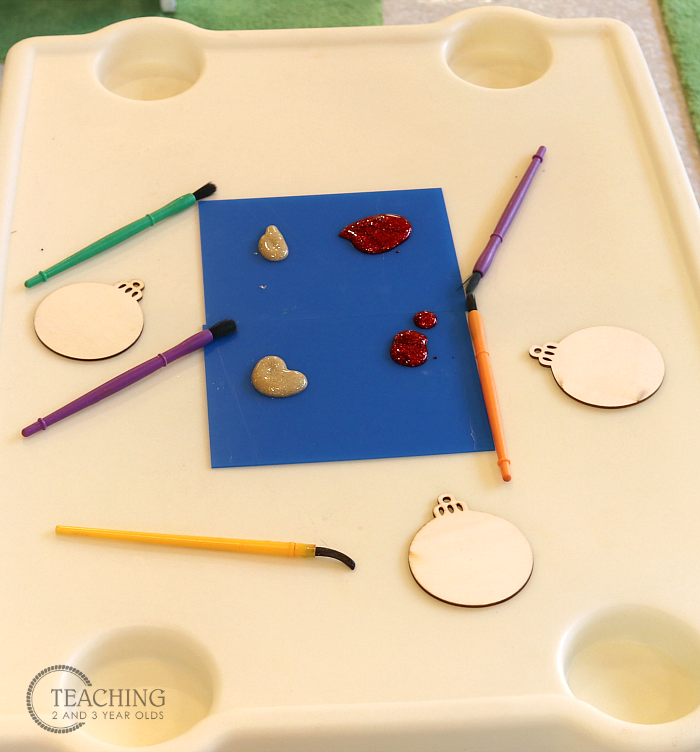
The invitation:
As with all of my art activities, I like to have everything ready before the children arrive.
I had the paint, brushes, and a few of the ornaments on the table, ready for the first group of children.
I also wrote each child’s name on pieces of masking tape so I could lightly place the tape on the ornament after it was painted. (This is just temporary, until I put their photos on the ornaments.)
Step 1:
The children painted both sides of the ornament and I very lightly stuck their names on the edges of their ornaments, letting them dry completely.


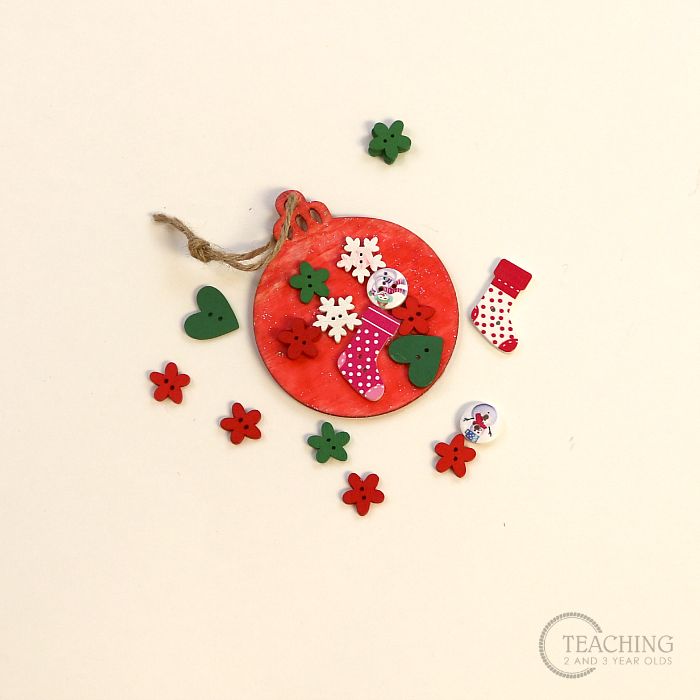
Step 2:
We got some fine motor going on by brushing glue on one side of the ornament.
Then, they pressed the buttons anywhere they wanted on that same side.
Some children wanted more buttons and that was fine. It’s their gift to give, after all!

Step 3:
I glued the children’s photos to the side of the ornament that did not have the buttons.

I then put a couple of coats of the Modge Podge on each side of the ornament, over the buttons and over the photo.
Now that I look back on all of the ornaments we have made, I think this one is my favorite.
Then again, I just might say that about next year’s ornament, too!

Next week the children will wrap these ornaments in tissue paper and place them in their gift bags along with a handmade card.
More ornament ideas:
Gingerbread Suncatcher Ornaments
FREE CIRCLE TIME PLANNER!
Get your FREE circle time planner as a gift when you subscribe to my free weekly newsletters.
Here is my Privacy Policy