
Last Updated on October 27, 2025 by Sheryl Cooper
Inside: Looking for a fun gingerbread art activity for toddlers and preschoolers? This process art method uses golf balls and paint! Free printable included.
If you are looking for activities to go with the gingerbread theme, you’ve got to try this easy gingerbread art.
Ditch the paintbrushes and use golf balls!
Wait, what? Golf balls?
Yep!
Our 2 and 3 year olds had so much fun using this method when painting farm pigs that I knew we had to do it again.
👉 I’ve created a free gingerbread printable you can use with this activity! Scroll down to find the download link.

How to Create Easy Gingerbread Art Using Golf Balls and Paint
Watch the Video
Before we did any gingerbread activities, I read Mara Alperin’s version of The Gingerbread Man.
I’ve read many different versions of this story, but Ms. Alperin’s version had our 2 and 3 year olds giggling and then laughing at the funny things each animal made as it tried to catch the clever gingerbread cookie.
“Oh, milkshake!”
“Oh, applesauce!”
“Oh, whiskers!”
Some of my preschool parents told me that their children were repeating these sentences once they got home, laughing.
They were quite intrigued that the sly fox was able to convince the gingerbread man to jump all the way up to his head.
So, when we got ready to make this gingerbread art, I reminded them about the gingerbread man in the book, and how we were going to paint him.
With golf balls!
Supplies
Painting with golf balls has got to be one of the easiest activities out there, and it requires 3 items.
- Gingerbread printable (scroll down page to find download)
- You choice of paint (I like to have ours in squeeze bottles.)
- Container with sides
- Golf balls
Preparation
Make enough copies of the gingerbread printable so each child can make at least one. (I always have extra on hand in case someone wants to do more than one.)
Gather your choice of paint.
The Process
I set everything on our Simplay3 activity table as the children were finishing snack.
A couple of years ago I realized that since our children finish eating at different times, it would be nice to have an art activity ready as a way to transition from snack to play.
The children actually look forward to this time, and come running over as soon as they take care of their snack garbage and wash their hands.
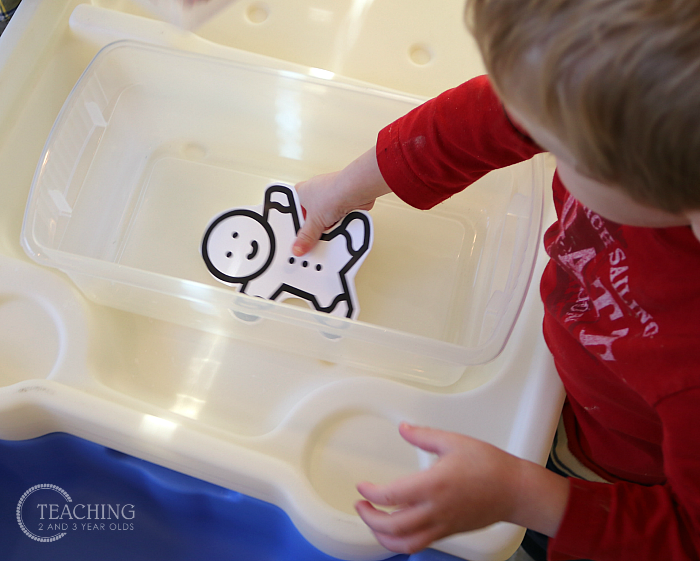
As they arrived at the table I handed them one of the gingerbread printables and they placed it into the container.
Of course, this can also be done at a regular table!
Tip: I always write their names on the back of the paper before the activity begins. Twenty years of experience has proven that if I don’t do this, I will forget altogether to put their names on it.

Gingerbread Man Circle Time Activity
- Toddlers
- Preschool
I handed the children the squeeze bottle filled with paint.
But yes, I was standing right there so I could stop them when I felt there was enough paint in the container.
Because experience has also shown me that they will continue to squeeze until most or all of the paint has been released.
Tip: I like to transfer tempera paint from our big gallon-sized containers to plastic squeeze bottles. It just makes everything easier! Especially since the gallon-sized paint is stored in our preschool storage closet on a different floor.

Then, drop a couple of golf balls into the container.
The first time I do golf ball painting, I show the children how to hold onto each side of the container and rock it back and forth.
Since this was our 2nd time golf ball painting this year, they needed little assistance.
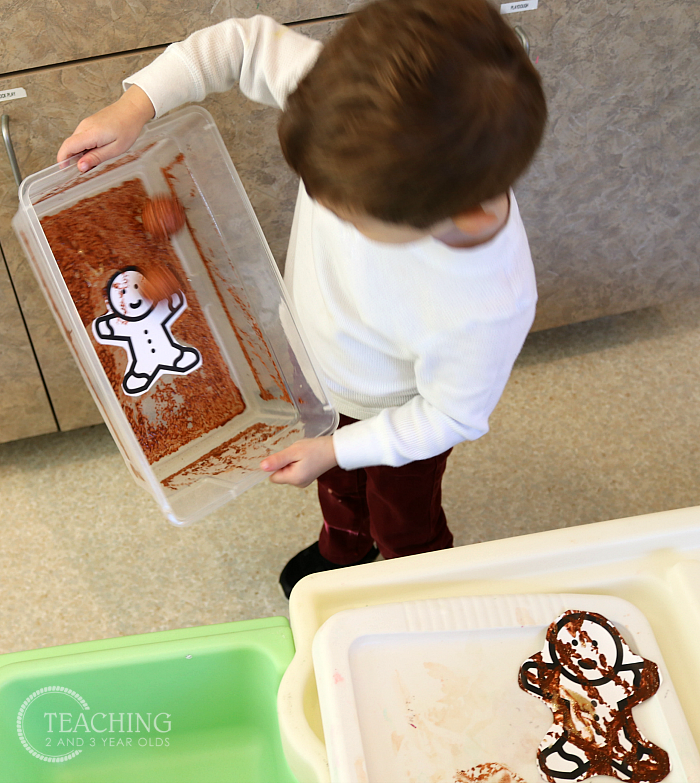
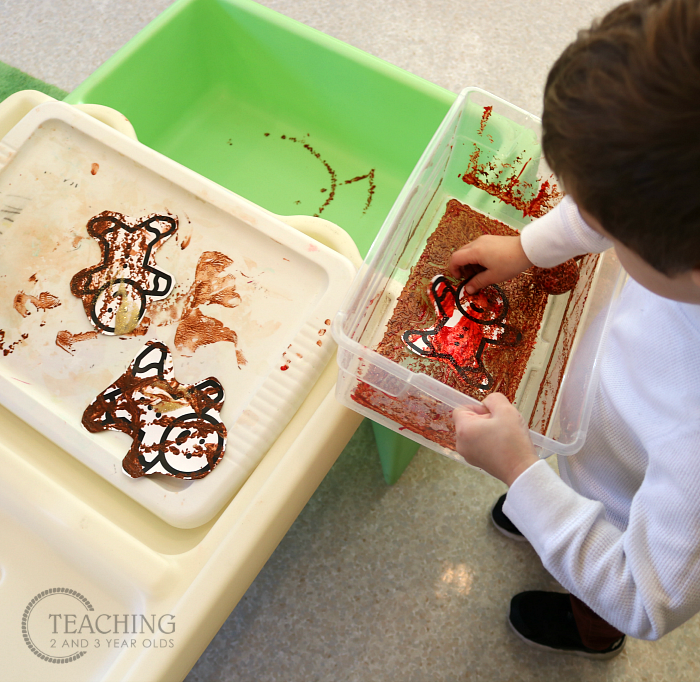
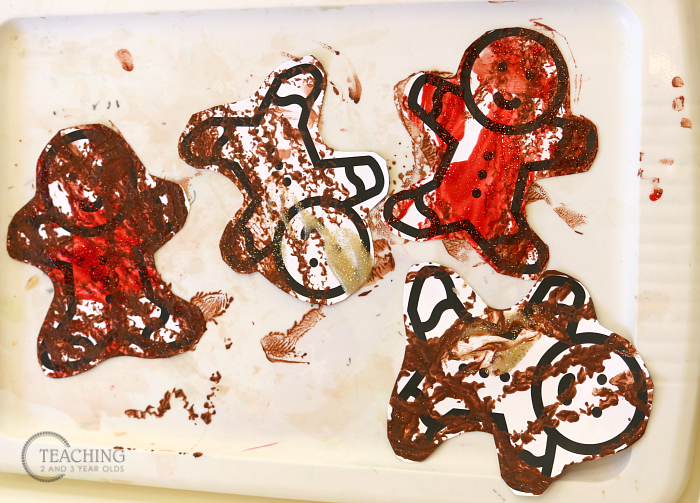
When they finish, remove their painted gingerbread pieces from the container and onto a tray.
Tip: Always have trays nearby, ready to go! Many of our trays are actually lids to plastic containers that got misplaced. We’ve used them for over 15 years and they are still going strong!
I let the painted gingerbread pieces dry thoroughly.
Once dry, I punched holes in each arm and connected them using brads to make a banner. You can see the method in this post.
I then used suction cup hooks to display them in the window.
Along with our star suncatchers. Because I love using our windows to display the children’s work!
Watch: Our Favorite Gingerbread Circle Time Activities

And then, once the gingerbread pieces are ready to go home, just remove the brads and there you go!
Free Gingerbread Man Printable

Gingerbread Man Books
- The Gingerbread Man (Easy to Read Folktales)
- Gingerbread Baby (Jan Brett)
- How to Catch a Gingerbread Man (Adam Wallace)
- Ten Tiny Gingerbread Men (Tiger Tales)


FREE CIRCLE TIME PLANNER!
Get your FREE circle time planner as a gift when you subscribe to my free weekly newsletters.
Here is my Privacy Policy