
Last Updated on November 1, 2025 by Sheryl Cooper
Inside: Learn how to put together a simple Christmas sensory table that includes pom poms and other simple materials. A fun way to work on fine motor skills while exploring different textures!
Our toddlers and preschoolers love using pom poms, so I add them to lots of our activities. (Check out these 10 pom pom activities!)
But of all the ways we use them, they are most enjoyed in the sensory table where they can be handled with the hands or different tools such as scoops and tongs.
So when I put together a fun and easy Christmas sensory table, I naturally just had to add pom poms!

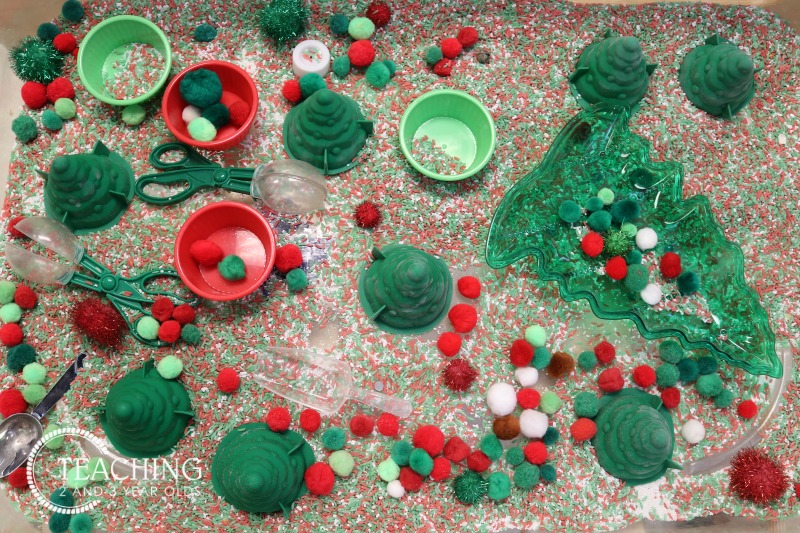
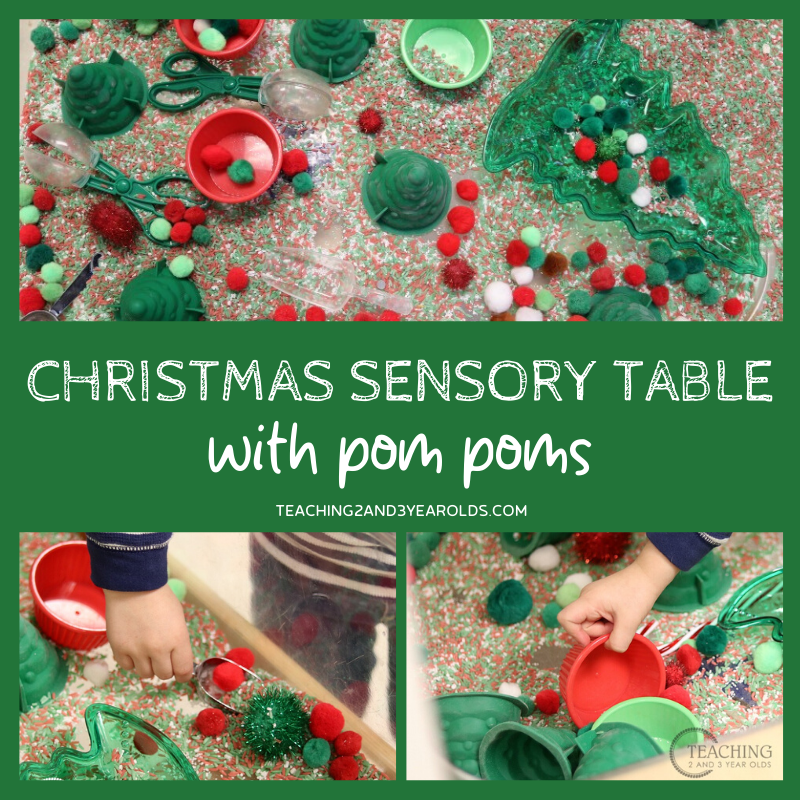
Easy Christmas Sensory Table with Pom Poms
The idea to add pom poms to our Christmas sensory table came to me as I was setting out materials for some cute watercolor Christmas wreaths.
After placing what we needed onto trays, I realized we had an abundance of leftovers.
I put the leftover pom poms aside while finding other materials I knew would be perfect for this activity.
Ta da!
A fun and easy Christmas sensory table was ready in minutes.
Ha ha! After editing these photos I noticed some brown pom poms snuck in there! Can you see them?
What we used:
- Pom poms
- Dyed rice (instructions below)
- Scoops
- Bug tongs
- Cups
- Tree molds
- Trays
Now, you don’t need to have all of these for a fun Christmas sensory table.
Rummage through your stash and pull out what you already have. Just make sure to include a filler and the pom poms!

Christmas Theme Packet
- 9 Activities
- Download, Print, Enjoy!

First, Dye the Rice
I’ve been doing this for so long that I forget that not everyone knows how to dye rice. So before I move on, let me share the method.
I fill a gallon plastic bag (that can be sealed) halfway with uncooked white rice.
If I’m making different colors of rice, I use separate bags for each color.
Then, I add the color (I prefer using Wilton’s Icing Gels) and a bit of vinegar. You really don’t need much – just enough to move the color around.
You can use rubbing alcohol instead of vinegar if that’s what you already have. I’ve done it both ways.
Seal the bag and use your hands to “smoosh” the rice around until all the rice is covered with color.
I then take a cookie sheet and line it with paper towels.
The gallon plastic bag then gets opened and I pour the colored rice onto the paper towel, smooth it out so it’s a fine layer, and let it dry.

Now, Add Everything to the Sensory Table
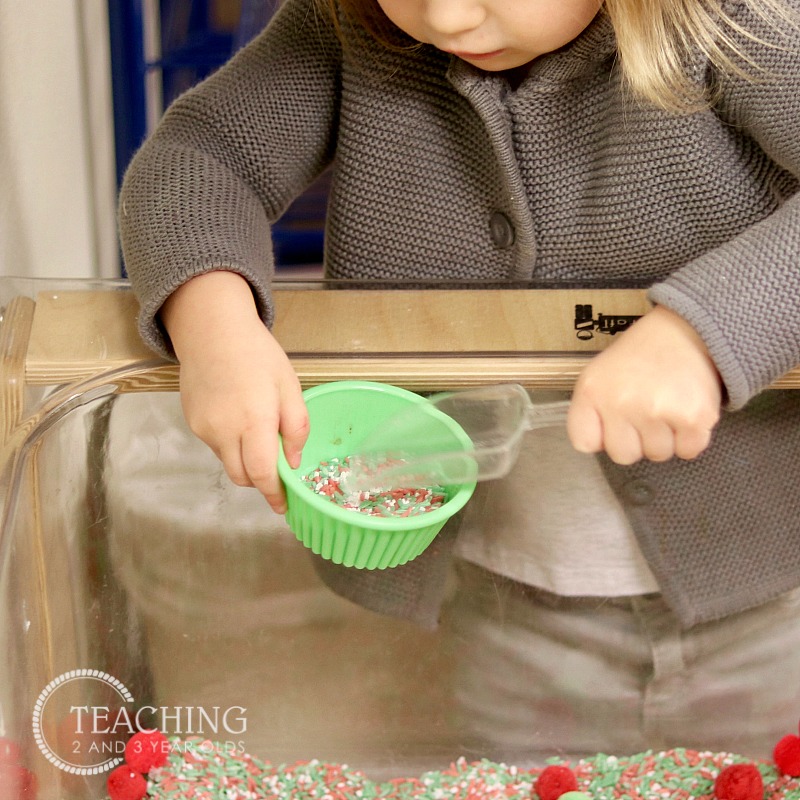
Pour the dyed rice into the bin.
I have learned over the years that you really do not need a whole lot of rice.
In fact, I prefer to keep it pretty shallow because there are less spills.
Notice I said less spills, not no spills.
Spills will happen, and that’s why I keep a small hand broom and dust pan nearby.
The Activity
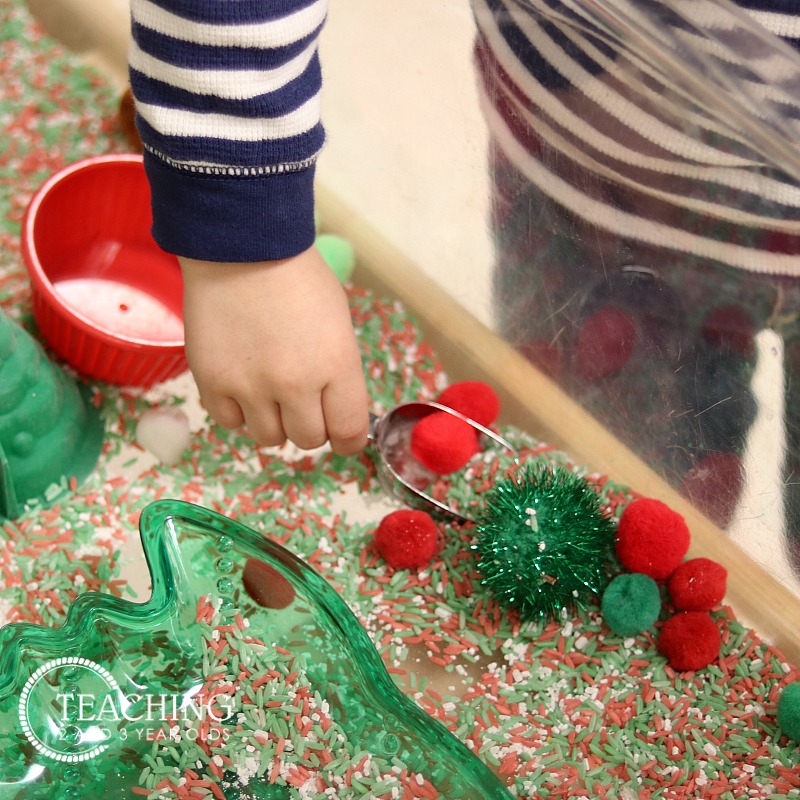
Because I have children at different stages of fine motor strength, I like to add a few different types of tools for transferring the pieces.
With this sensory bin I used:
- cups
- scoops
- bug tongs
The cups are the easiest to use. The entire hand can grasp the cup while moving it in different directions.
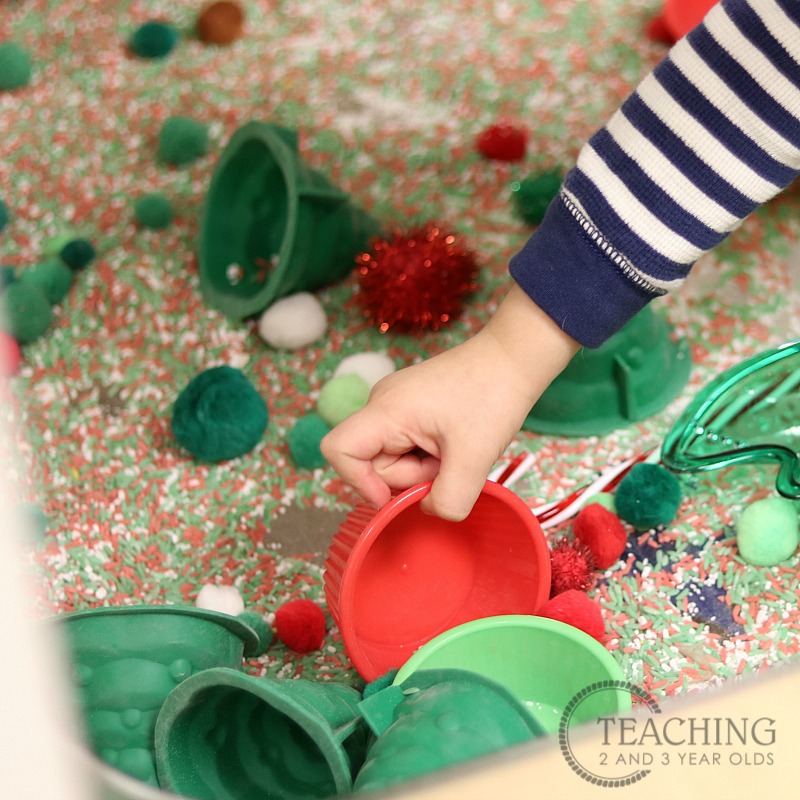
Young children also enjoy filling the cups using one of the other fine motor tools.
Scoops are another important tool that I add to most of our sensory bins.
They take a bit more coordination to use scoops, but even our toddlers can handle them after some practice.
Bug tongs take a bit more concentration.
Toddlers and young preschoolers will use 2 hands, as shown in the photo below.
However, as their fine motor development strengthens, they will be able to manipulate the bug tongs using just 1 hand, much like using scissors.

Adapting for Older Preschoolers
If I wanted to add even a greater challenge, I could have added tweezers. Since this particular group was young, I didn’t add them.
But it’s always an option when I feel some of the children are ready.
If you want to know more about what I look for while setting up any sensory bin, head on over and watch this video.
More Christmas Ideas


FREE CIRCLE TIME PLANNER!
Get your FREE circle time planner as a gift when you subscribe to my free weekly newsletters.
Here is my Privacy Policy